Rubber Plant Care (2026): 7+ Common Mistakes to Avoid
Your rubber plant’s leaves are turning yellow, curling, or dropping, and you’ve followed the plant tag instructions to the letter. You water it every Sunday like clockwork. You gave it a spot near a window. And yet, leaf by leaf, it keeps looking worse.
Here’s the good news: rubber plants (Ficus elastica) are genuinely one of the easier statement houseplants to grow, and 2026 is proving to be their year. Most of the trouble people run into comes down to a short list of avoidable habits, not bad luck or a ‘black thumb.’
Below are the 7+ mistakes that quietly hurt rubber plants the most, why each one matters more than it seems, and exactly how to fix it — starting with the one that trips up almost everyone.
Mistake #1: Watering on a Schedule Instead of Watering the Plant
This is the single most common rubber plant mistake, and almost everyone makes it without realizing. Watering every Sunday like clockwork feels responsible, but a rubber plant doesn’t care what day it is — it cares whether its roots are sitting in soggy soil.
More houseplants are lost to loving them too much with water than to neglect.
How Often Should You Actually Water a Rubber Plant?
There’s no single magic number, since it depends on your light, pot size, and the season. As a loose starting point, most rubber plants need water roughly every 1 to 2 weeks indoors — but the calendar should never be the deciding factor.
The Finger Test: A Better Way to Check Soil Moisture
- Push a finger about two inches into the soil near the edge of the pot.
- If it feels moist, wait a few more days and check again.
- If it feels dry at that depth, it’s time to water thoroughly.
- Water until it runs freely from the drainage holes, then let the pot finish draining completely.
Overwatered or Underwatered? How to Tell the Difference
| Symptom | Overwatered | Underwatered |
|---|---|---|
| Leaf feel | Soft, mushy, sometimes yellowing | Dry, wrinkled, or crispy |
| Soil condition | Heavy, soggy, possibly smelly | Bone dry, pulling away from pot edges |
| Leaf drop pattern | Lower leaves yellow and drop first | Leaves curl inward before dropping |
| Fix | Let soil dry out fully before watering again; check for root rot | Water thoroughly and check more often going forward |

Mistake #2: Keeping the Plant in Low Light
A rubber plant can technically survive in a dim corner, but ‘surviving’ and ‘thriving’ are two very different things. Low light is one of the sneakiest mistakes because the plant doesn’t collapse right away — it just quietly stalls.
Does a Rubber Plant Need Direct Sunlight?
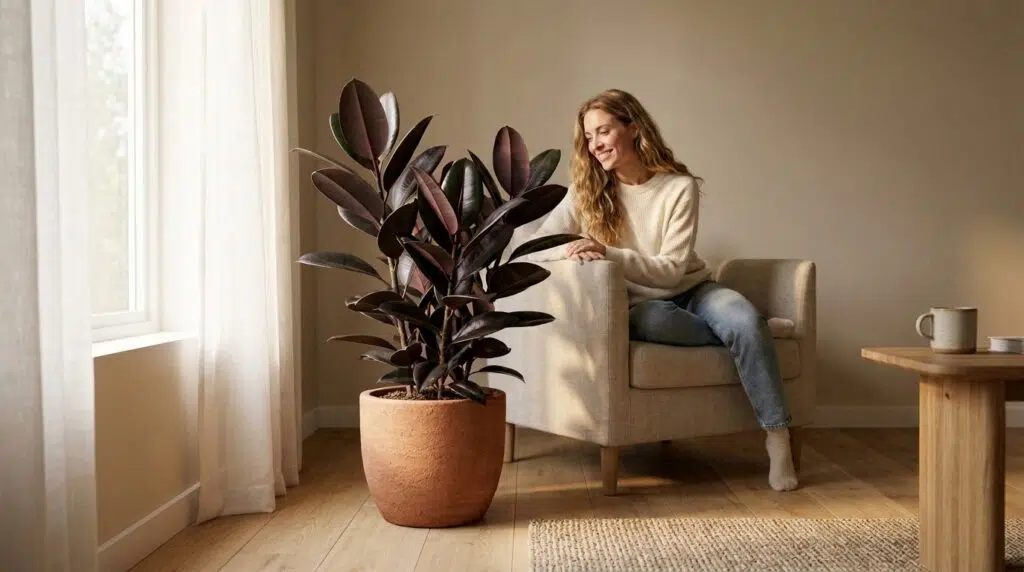
Not exactly. A rubber plant wants **bright, indirect light** — a few feet back from a sunny window, not sitting directly in hot midday sun. A little gentle morning sun is fine and can even deepen the color on varieties like Burgundy, but hours of intense afternoon sun through unfiltered glass can scorch the leaves.
Signs You're Making the Low-Light Mistake
| Sign | Likely Cause | What To Do |
|---|---|---|
| Small, pale new leaves | Not enough light | Move closer to a bright window or add a grow light |
| Leaning heavily toward the window | Light coming from only one direction | Rotate the pot a quarter turn every week or two |
| Very slow or no new growth | Chronic low light | Relocate to a brighter spot or supplement with a grow light |
| Scorched, crispy brown patches | Too much direct sun (the opposite mistake) | Move a few feet back or add a sheer curtain |
If your only available spot is genuinely dim, a simple grow light setup fixes this mistake fast. For rooms that will always be dark no matter what, it’s honestly easier to pick a plant suited for it — check out low light indoor plants or garden plants for shade for better-suited options.

Mistake #3: Using Heavy or Poorly-Draining Soil
Plain garden soil or a dense, moisture-retentive potting mix might seem like a safe default, but it’s one of the quieter mistakes that sets up bigger problems down the road, including root rot.
What Soil Does a Rubber Plant Actually Need?
What Soil Does a Rubber Plant Actually Need?
Rubber plants want soil that holds a bit of moisture but never stays soggy. A simple, reliable mix is about 60% quality potting soil, 20% perlite, and 20% orchid bark or coarse sand. Our full soil type guide breaks down how different amendments affect drainage if you want to go deeper.
Why This Mistake Matters More Than It Seems
Why This Mistake Matters More Than It Seems
Roots need oxygen just as much as they need water. Dense, compacted soil suffocates roots and creates the perfect conditions for fungal problems — even if you’re watering correctly otherwise. For a broader look at what makes container soil work well, see our guide on well-draining soil.

Mistake #4: Choosing a Pot Without Drainage Holes
Alt title: Rubber Plant Pot Mistake: Why Drainage Holes Are Non-Negotiable
That gorgeous ceramic pot without a drainage hole looks great on a shelf, but it’s quietly one of the most common rubber plant killers out there. Without a way for excess water to escape, even correct watering habits can lead to standing water at the roots.
How to Choose the Right Pot and Drainage
Always choose a pot with at least one drainage hole, or keep the plant in its nursery pot and slip that inside a decorative outer pot instead. Our pot sizes guide and pot size calculator can help you match the container size to your plant.
When Should You Repot a Rubber Plant?
Repot every 1 to 2 years, or sooner if roots are visibly circling the drainage hole. Spring and early summer are the best windows, since the plant is actively growing and recovers quickly. If you’re planning for a plant that can reach 6 to 10 feet tall indoors, a gallon pot size finder is worth bookmarking before you outgrow your current container.

Mistake #5: Moving the Plant Too Often
Rubber plants like routine. Shuffling the pot from room to room, or even rotating it dramatically every few days, can trigger stress responses that look a lot like disease but are really just the plant adjusting to constantly changing light and airflow.
Why Rubber Plants Dislike Being Relocated
Every time a plant moves, it has to reorient its leaves toward the new light source and readjust its internal water balance. Do that too often, and the plant spends more energy adapting than growing.
The fix is simple: pick one good spot with bright, indirect light and commit to it. A gentle quarter-turn every week or two for even growth is fine — dragging the whole pot around the house is not.

Mistake #6: Ignoring Temperature and Humidity Changes
Does a Rubber Plant Like Humidity?
Rubber plants appreciate moderate humidity but are far more adaptable than fussier tropical plants. Average indoor humidity is usually enough; a small humidifier only becomes helpful if your home is extremely dry.
The Temperature Mistake That Catches People Off Guard
Rubber plants generally prefer temperatures between 60 and 85°F. Placing one directly next to a cold draft, an air conditioning vent, or a blasting winter heater is a common mistake that leads to sudden, unexplained leaf drop even when watering and light are perfectly fine.
Can Rubber Plants Live Outdoors?
In warm, frost-free climates, yes — they can live outdoors year-round in bright, filtered light. In cooler regions, they make a happy patio plant for the warm months but need to come back indoors well before the first frost.

Mistake #7: Applying Too Much Fertilizer
Fertilizing more often ‘to help it grow faster’ is a mistake that almost always backfires. Excess fertilizer builds up as salt in the soil, which burns tender roots and shows up as crispy, browned leaf edges.
How Often Should You Actually Fertilize?
During spring and summer, feed every 4 to 6 weeks with a balanced liquid houseplant fertilizer diluted to half strength. In fall and winter, growth slows way down, so cut back to once every couple of months or stop altogether. If you’re unsure which product fits your plant, our fertilizer selector can help.

Mistake #8: Pruning at the Wrong Time or Cutting Too Aggressively
Alt title: Rubber Plant Pruning Mistake – Timing and Technique Matter
Pruning in the wrong season, or hacking off too much at once, can stall a rubber plant’s growth for months. The good news is that once you know the timing, it’s a genuinely easy plant to shape.
How and When to Prune a Rubber Plant
The best time to prune is in spring or early summer, right as active growth kicks in. Use clean, sharp shears and cut just above a leaf node, where new growth will emerge. Avoid heavy pruning in fall or winter, when the plant has little energy to recover.
How to Make a Rubber Plant Bushier (Without Overdoing It)
Left alone, a rubber plant grows straight up like a single pole with leaves. To force it to branch out, snip just the top few inches off the main stem — not the whole top third. This encourages two or more new stems to emerge just below the cut instead of shocking the whole plant.
Some growers also use a technique called notching — a small cut just above a leaf node without removing the tip — to trigger a new branch at that exact spot without sacrificing height.

Mistake #9: Forgetting to Clean Dust From the Leaves
It sounds minor, but a thick layer of dust on those big glossy leaves blocks light and clogs the pores plants use to breathe. Over time, a dusty rubber plant photosynthesizes less efficiently and becomes more vulnerable to pests.
How to Clean and Shine Rubber Plant Leaves
Wipe each leaf gently with a soft, damp cloth every few weeks, supporting it from underneath so it doesn’t tear. Skip commercial ‘leaf shine’ sprays, which can clog pores just as badly as dust does — a simple wipe with water does the job perfectly.

Mistake #10: Ignoring Early Signs of Pests or Disease
Alt title: Rubber Plant Pest Mistake: Why Waiting Too Long Costs You the Plant
By the time pest damage is obvious across the whole plant, the problem has usually been building for weeks. Checking leaves regularly and acting on the first sign of trouble is far easier than recovering from a full infestation.
Common Rubber Plant Pests to Watch For
Spider mites show up as fine webbing and tiny speckled dots on leaves. Scale looks like small brown bumps stuck to stems. Mealybugs leave behind a cottony white residue, and aphids cluster on new growth.
Root Rot: The Disease Mistake Compounds Into
Root rot is almost always tied back to the overwatering mistake covered earlier. A mushy, dark stem base or a sour smell from the soil are red flags worth acting on immediately. For related leaf-level issues across your indoor plants, our leaf spot diseases guide is a useful companion resource.
Simple Prevention Habits
- Wipe leaves down regularly to remove dust and catch pests early
- Isolate any new plant for a couple of weeks before placing it near others
- Avoid overwatering, which weakens roots and invites fungal problems
- Increase airflow around the plant instead of crowding it against others

Bonus: Rubber Plant Leaf Problems Decoded
If you’ve avoided all ten mistakes above and something still looks off, use this quick decoder to narrow down the cause.
| Symptom | Most Likely Cause | Quick Fix |
|---|---|---|
| Yellow leaves (lower ones first) | Overwatering (Mistake #1) | Let soil dry out fully; check drainage |
| Brown, crispy edges | Underwatering, low humidity, or fertilizer buildup (Mistakes #1, #6, #7) | Water more consistently; flush soil occasionally |
| Leaves curling inward | Underwatering or temperature stress (Mistakes #1, #6) | Check soil moisture and keep away from drafts or vents |
| Drooping, limp leaves | Both over- and underwatering can cause this (Mistake #1) | Check soil moisture before assuming either extreme |
| Dropping leaves suddenly | Shock from a move or cold draft (Mistakes #5, #6) | Keep conditions stable for a few weeks after any change |
| New leaves stay small or won’t unfurl | Low light or inconsistent watering (Mistakes #1, #2) | Improve light and stick to a consistent watering check |
If your other houseplants are showing similar yellowing, our general guide on why plant leaves turn yellow covers the wider set of causes beyond just rubber plants.

Bonus: How to Propagate a Rubber Plant (So Mistakes Don't Cost You the Whole Plant)
One nice thing about rubber plants: even if a mistake damages part of the plant, a healthy cutting can usually save the day.
How to Propagate a Rubber Plant in Water
- Cut a healthy stem section with at least one or two leaf nodes, just below a node.
- Remove any lower leaves that would sit underwater.
- Place the cutting in a jar of clean water, keeping the node submerged.
- Change the water every few days and keep the jar in bright, indirect light.
- Once roots are a couple of inches long, transplant into well-draining potting soil.
Can You Propagate a Rubber Plant From a Leaf?
A single leaf alone (with no stem node attached) usually won’t grow into a new plant — it may root a little but stall there. You need at least a small piece of stem with a node for a genuinely new, independent plant.

Bonus: Best Rubber Plant Varieties for Every Home
| Variety | Leaf Look | Best For |
|---|---|---|
| Burgundy | Deep near-black maroon leaves | Moody, dramatic interiors |
| Ruby | Green leaves edged in pink and cream | Adding a soft pop of color |
| Tineke | Green, white, and cream variegation | Brighter rooms with more light |
| Robusta | Classic large, glossy dark green leaves | Beginners wanting the easiest care |
Solid green varieties like Robusta handle lower light far better than variegated types, since variegated leaves have less chlorophyll and need more light to keep their color and energy up. If you’re decorating a dim room, pair this pick with our roundup of best indoor plants for more low-light-friendly options.
Bonus: Are Rubber Plants Toxic to Cats and Dogs?
Yes, rubber plants are considered mildly toxic to both cats and dogs. The milky sap can irritate the mouth and stomach if chewed, leading to drooling, vomiting, or mild skin irritation on contact.
It’s rarely life-threatening, but it’s still worth keeping the plant out of reach of curious pets, especially kittens and puppies that like to chew on greenery. If you’re building a pet-friendly plant collection, our poisonous plants finder and animal-resistant plants finder are great next stops before your next plant purchase.

Bonus: Rubber Plant Care Through the Seasons
| Season | Watering | Light & Fertilizing |
|---|---|---|
| Spring | Check soil weekly as growth ramps up | Resume regular feeding every 4–6 weeks |
| Summer | Water when top 2 inches feel dry, likely more often | Full feeding schedule, watch for intense afternoon sun |
| Fall | Start spacing out waterings as growth slows | Taper fertilizer to once every couple of months |
| Winter | Water sparingly; let soil dry out more between waterings | Little to no fertilizer needed; watch for cold drafts |

Your Quick Rubber Plant Care Checklist
- Water: Check the soil first; water only when the top two inches are dry
- Light: Bright, indirect light — a few feet back from a sunny window
- Soil: Well-draining mix with perlite or bark
- Pot: Always choose one with a drainage hole
- Placement: Pick one good spot and stick with it
- Climate: Keep away from drafts, vents, and sudden temperature swings
- Fertilizer: Every 4–6 weeks in spring/summer, little to none in fall/winter
- Pruning: Only in spring/early summer, and only a few inches at a time
- Leaves: Wipe down every few weeks to remove dust
- Pests: Check leaves regularly and act at the first sign of trouble

Frequently Asked Questions About Rubber Plant Care
Final Thoughts: Fix the Habits, Not Just the Symptoms
None of these ten common houseplant care mistakes are complicated to resolve once you understand why they happen. Most issues stem from the exact same root cause: maintaining plant care on autopilot rather than routinely assessing what your plant actually needs.
Fix your watering habits first, as correcting moisture levels reverses plant damage faster than any other single adjustment. From there, refine your plant's lighting conditions, soil aeration, container size, and room placement at your own pace. With the iconic Ficus enjoying its spotlight as the National Garden Bureau's 2026 Houseplant of the Year, there has never been a better time to introduce one of these bold, glossy statement plants into your home setup.