Chair Rail Guide: Heights, Styles & Installation
Why Chair Rail Height Trips Up So Many Homeowners
You’ve probably stood in your dining room with a strip of molding in one hand and a tape measure in the other, wondering why nobody just gives you a straight answer for how high a chair rail should actually go.
You’re not alone. Chair rail height is one of those small details that quietly makes or breaks a room. Get it right, and the wall looks intentional, balanced, and expensive. Get it wrong — even by a few inches — and the whole room feels off, even if you can’t quite say why.
The good news: there’s a simple rule behind it, a few smart exceptions, and once you understand both, you’ll never second-guess a chair rail height again. That’s exactly what this guide walks you through, from the classic one-third rule to room-by-room recommendations, molding styles, installation steps, and design ideas that make a chair rail look like it was always meant to be there.
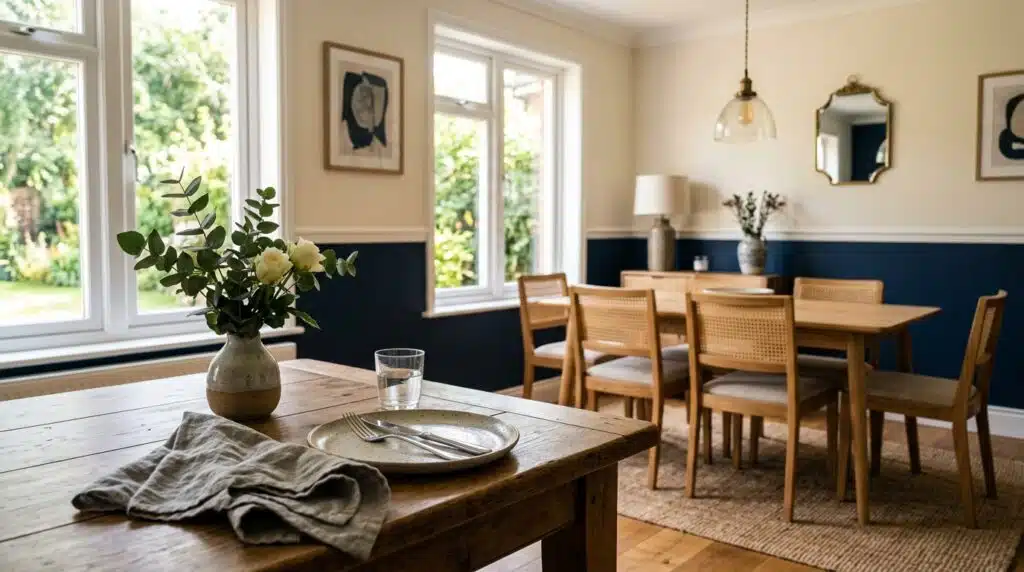
What Is a Chair Rail?
A chair rail is a horizontal strip of molding installed around the perimeter of a room, roughly a third of the way up the wall. It got its name the old-fashioned way — it was literally there to stop dining chairs from scuffing and denting plaster walls every time someone pushed back from the table.
These days, most of us aren’t worried about chair damage nearly as much as we’re worried about how flat and boring a plain wall looks. So the chair rail has quietly shifted jobs. It’s now mostly a design feature: it breaks up a tall wall, adds architectural character, and gives you a clean line to work two paint colors, wallpaper, or wainscoting around.
In the UK, you’ll hear the same thing called a dado rail — same molding, same purpose, different name.
Chair Rail vs. Picture Rail vs. Dado Rail
| Feature | Chair Rail | Picture Rail | Dado Rail |
|---|---|---|---|
| Height | 32–36" from floor | 10–16" below ceiling | 35–47" from floor |
| Purpose | Protects walls from chair backs; decorative | Hangs artwork without nails | Decorative wall division (UK term) |
| Location | Lower third of wall | Near ceiling | Similar to chair rail |
| Thickness | Typically wider (1–4+ inches) | Usually thinner (~40mm) | Varies (40–150mm) |
Standard Chair Rail Heights
This is the part everyone actually searches for, so let’s get straight to it.
The One-Third Rule
The rule of thumb architects and designers use is simple: install the chair rail at about one-third the height of your wall, measured from the floor.
| Ceiling Height | Recommended Height | Rule of Thumb |
|---|---|---|
| 8 feet | 32–36" | One-third ≈ 32″ |
| 9 feet | 36" | One-third = 36″ |
| 10 feet | 40–44" | One-third ≈ 40″ |
| 12 feet | 48–52" | One-third = 48″ |
For a standard 8-foot ceiling, that math works out to roughly 32 inches. Some designers now prefer going a bit lower — closer to one-quarter of the wall height — for a more modern, streamlined look that doesn’t visually chop the room in half.
If you’d rather not do the arithmetic in your head, the formula is simple: take your total wall height, convert it to inches, and divide by three. A 9-foot wall (108 inches) divided by three lands almost exactly at 36 inches. Put another way, the rail sits at roughly 33% of the wall height, no matter how tall your ceilings get.
Taller rooms follow the same formula; it just scales up. A 10-foot wall (120 inches) puts one-third at 40 inches, and many designers let it creep up to about 44 inches. A 12-foot wall (144 inches) lands at 48 inches, with some going as high as 52. The taller the room, the more the eye needs that one-third proportion to keep the wall from feeling top-heavy.
It also helps to check your placement two ways: up from the floor and down from the ceiling. Most people measure up from the floor because that’s what a tape measure naturally does, but checking the distance from the ceiling down is a smart second measurement. It confirms your placement is still proportional even if your floor isn’t perfectly level from wall to wall.
Not sure of your exact wall height? Our ceiling height guide and calculator walks you through measuring it accurately. Once you have that number in inches, divide by three and you have your starting chair rail height.
Traditional vs. Modern Heights
| Approach | Height | Best For |
|---|---|---|
| Traditional | 32–36" | Formal dining rooms, historic homes |
| Modern/Lower | 28–32" | Contemporary spaces, rooms with lower furniture |
| Higher | 36–42" | Rooms with tall ceilings, formal spaces |
Here’s the part that trips people up: the chair rail’s height should not be based on the height of your actual chairs. It’s easy to assume that because it’s called a “chair” rail, but the name is really a nod to its original job, not an instruction manual. Think of it as a proportion tool for the wall, not a furniture-matching exercise.
Chair Rail Height by Room Type
| Room | Recommended Height | Notes |
|---|---|---|
| Dining Room | 32–36" | Classic placement; guards walls from chair backs |
| Living Room | 32–36" | Standard, adjustable to furniture |
| Bedroom | 32–36" | Creates cozy, intimate feel |
| Hallway | 32–36" | Adds architectural interest |
| Bathroom | 36–42" | Higher to accommodate fixtures |
| Children's Room | 28–32" | Lower for child-scale proportions |
Bottom line: there’s no single “legally correct” chair rail height. There’s a smart starting point (one-third of the wall), and then there’s what actually looks right once you see it on your own walls.

Types of Chair Rail Molding
Once your height is locked in, the next decision is style. This is where a chair rail goes from “practical trim” to “actual design statement.”
By Style
| Style | Characteristics | Best For |
|---|---|---|
| Traditional / Colonial | Three half-round profiles, intricate lines | Formal dining rooms, historic homes |
| Victorian | Ornate, detailed patterns | Period properties, elegant spaces |
| Modern / Minimalist | Flat, clean lines, simple profiles | Contemporary interiors |
| Craftsman | Simple, handcrafted look | Arts & Crafts style homes |
| Rustic | Unfinished or stained natural wood | Farmhouse, cabin, cottage |
| Curved | Flexible molding for arches and curves | Unique architectural features |
By Profile
| Profile | Description | Common Name |
|---|---|---|
| Ogee | S-curve shape | Ogee molding |
| Ovolo | Quarter-round convex curve | Ovolo |
| Cavetto | Concave curve | Cavetto |
| Cyma Recta | S-curve with convex top | Cyma recta |
| Cyma Reversa | S-curve with concave top | Cyma reversa |
| Beaded | Rounded bead detail | Beaded chair rail |
| Egg-and-Dart | Alternating egg and dart shapes | Egg-and-dart |
| Basket Weave | Woven texture | Basket weave |
Built-Up vs. Single-Piece
| Type | Description | Best For |
|---|---|---|
| Single-Piece | One solid molding | Simple, clean installations |
| Built-Up | Multiple stacked moldings | Custom, elaborate designs |
| High-Profile | Tall, detailed molding | Large rooms, grand spaces |
| Low-Profile | Shorter, simpler molding | Small rooms, modern spaces |
If you’re pairing your chair rail with wall panels below it, our wall panel style and size calculator can help you match panel proportions to whichever molding profile you land on.

How to Measure for Chair Rail (So You Don't Run Short)
Before any molding gets cut, you need real numbers — not guesses. Measuring walls for chair rail is straightforward, but it’s the step most people rush, and it’s exactly why they end up back at the hardware store mid-project.
Start by walking the room with a tape measure and writing down the length of every wall at your target chair rail height, noting the width of any doorways or windows you’ll be stopping at. Add those numbers together to get your total linear footage. That total is the only number you really need, whether you work it out on a spreadsheet, an app, or a notepad.
Once you have your total, here’s how to calculate chair rail material without shorting yourself:
- Add a waste allowance. Plan on 10–15% extra length beyond your raw measurement. That covers miter cuts, the occasional bad cut, and any wood grain you want to match across pieces.
- Round up to standard lengths. Chair rail molding typically comes in 8, 10, 12, or 16-foot boards. Divide your total footage (plus waste) by the board length you’re buying, then round up; you can’t buy half a board.
- Account for corners separately. Every inside and outside corner “eats” a small amount of material in the miter cut, so don’t treat your wall measurements as pure, waste-free numbers.
Once you’ve snapped your level line (Step 1 below), take every measurement from that same line rather than from separate spots on each wall. Consistency here is what keeps your rail level all the way around the room, even if the room itself isn’t perfectly square.
Installation Guide: How to Install a Chair Rail Yourself
Installing a chair rail is one of the more forgiving weekend projects in home improvement. You don’t need advanced carpentry skills, just patience, a level, and a willingness to measure twice. The steps below cover the basic process, followed by tips for the trickier parts like corners, drywall, and door openings.
Tools You'll Need
| Tool | Purpose |
|---|---|
| Miter saw | Cutting angles (45° for corners) |
| Level | Ensuring straight installation |
| Tape measure | Measuring wall lengths |
| Brad nailer / finish nails | Securing molding to wall |
| Construction adhesive | Bonding molding to wall |
| Stud finder | Locating studs for nailing |
| Chalk line | Marking level line around room |
Step-by-Step Installation
Step 1: Determine Height
- Mark your desired height (32–36″ from floor is the standard starting point)
- Use a level to mark multiple points around the room
- Snap a chalk line connecting the marks so you have one continuous, dead-level guide
Step 2: Acclimate the Molding
- Let the molding sit in the room for 24–48 hours before you cut anything. Wood expands and contracts with humidity, and skipping this step is how gaps show up a month later.
Step 3: Measure and Cut
- Measure each wall section individually — don’t assume they’re identical
- Cut pieces with a miter saw
- Use 45-degree angles for inside and outside corners
- For long wall runs, use scarf joints (angled overlapping cuts) instead of a single butt joint
Step 4: Attach to the Wall
- Apply construction adhesive to the back of the molding
- Line up the bottom edge with your chalk line
- Press firmly against the wall
- Nail into studs with a brad nailer for a secure hold
- Recheck level as you move along the wall — small errors compound fast
Step 5: Finish
- Fill nail holes with wood filler
- Sand smooth once dry
- Paint or stain to match your design
Pro Tips That Actually Save You Time
- Paint the walls first. Painting around installed molding is fiddly and slow — do the wall color before the rail goes up.
- Always nail into studs. Adhesive alone won’t hold long-term, especially with seasonal wall movement.
- Dry-fit everything first. Lay pieces out before you glue anything, so you catch measuring mistakes while they’re still fixable.
- Use a stud finder generously. Mark every stud location on your chalk line before you start nailing, so you’re not hunting mid-installation.
If your project includes a full wainscoting build below the rail, our beadboard wainscoting calculator will help you nail down exact panel counts and material quantities before you buy anything.
Chair Rail Installation on Drywall
Most homes have drywall, not solid plaster, so these steps assume that’s what you’re working with. The one non-negotiable rule: drywall alone won’t hold a nail long-term. Use your stud finder to mark every stud along your chalk line, and treat construction adhesive as a helper, not the main attachment method. The nails into studs are what actually keep the rail from sagging or popping off the wall a few months later.
Chair Rail Installation Over Wainscoting
If you’re capping existing wainscoting or beadboard, the process works a little differently: the top edge of the panel becomes your reference line instead of a chalk line. Make sure that panel line is level first. If it’s not, you’ll need to shim or scribe the chair rail rather than trusting the panel edge blindly.
Chair Rail Installation Around Doors and Windows
Doorways and window casings are where a lot of first-time installers get stuck. At a door, you generally have two clean options: butt the rail squarely against the side of the door casing, or stop it just short and finish the end with a small mitered return. Windows work the same way. Let the window trim be the natural break rather than trying to notch the rail around it.

Design Ideas And Inspiration
This is where chair rail height stops being a measurement problem and starts being a design opportunity.
1. Two-Tone Walls
The single most popular chair rail look: paint the lower section one color, the upper section another. It’s simple, it’s timeless, and it can visually raise a low ceiling if you keep the lower color darker than the upper.
| Color Combination | Effect |
|---|---|
| Navy blue + light gray | Sophisticated, formal |
| White + beige | Classic, timeless |
| Blush pink + black | Bold, contemporary |
| Mint green + yellow | Fresh, playful |
| Forest green + white | Earthy, elegant |
Before you commit to a two-tone scheme, our paint calculator will tell you exactly how much of each color you’ll need for the upper and lower sections.

2. Wainscoting Below the Rail
Pair your chair rail with wainscoting — beadboard, board and batten, or raised panels — for a fuller, more architectural look.
- Beadboard: cottage and farmhouse style
- Board and batten: modern farmhouse
- Raised panels: formal, traditional
- Flat panels: contemporary, clean
3. Wallpaper Below or Above
Try wallpaper on one side of the rail and a solid paint color on the other. It’s a designer trick that reads as far more custom than it actually is to execute.
4. Modern Minimalist Rail
A slim, flat-profile chair rail — especially in a matte black or brushed metal finish — works surprisingly well in contemporary interiors that would otherwise skip trim entirely.
5. Integrated LED Lighting
Building a recessed channel into the top of a built-up chair rail lets you run LED strip lighting for a soft wash of ambient light — a genuinely modern twist on a very old detail.
6. Chair Rail with Molding Panels
Add picture-frame molding rectangles below the rail for a layered, architectural wall treatment that reads as high-end without needing full wainscoting.
7. Rustic Wood Texture
Skip the paint entirely and let a stained, natural-wood chair rail carry the farmhouse or cabin aesthetic on its own.

Chair Rail Ideas by Room and Style
The right profile and color scheme depend on the style of your home and the room you’re working in:
- Modern: slim, flat profiles in matte black or white, often skipping ornate detail in favor of a single clean line.
- Traditional: built-up, multi-piece moldings with visible detail, such as ogee or beaded profiles in a formal dining room.
- Contemporary: simple shapes paired with bold, unexpected paint colors, or an accent wall that uses the molding as a graphic element rather than a subtle detail.
- Living rooms: often suit a slightly lower placement and a soft two-tone palette, since living room furniture tends to sit lower than dining chairs.
- Hallways: a continuous rail that runs the full length of the corridor visually stretches a narrow space and gives you a natural line to hang art above.
- Bedrooms: a slightly lower rail with a muted or warm lower-wall color creates a calmer, cozier feel.
- Dining rooms: where the classic look still shines, with traditional height, a defined profile, and a two-tone or wainscoting pairing.
- Bathrooms: a higher placement (36–42″) to clear fixtures, usually in moisture-resistant PVC or polyurethane molding instead of solid wood.
Chair Rail Corners, Returns And End Caps
Corners and transitions are where a chair rail installation either looks seamless or gives itself away. A few terms are worth knowing before you pick up the miter saw.
- Inside corner: where two walls meet and fold inward (like the corner of a closet). Typically cut at complementary 45-degree angles, or coped for a tighter fit on out-of-square walls.
- Outside corner: where a wall juts outward toward the room (like an exposed column). These also use 45-degree miters, but measuring the outside point accurately matters more here than on inside corners.
- Miter joint: the angled cut itself — the two 45-degree ends that come together to form a clean 90-degree corner.
- Return: a small mitered piece that turns the end of the rail back into the wall, so you’re not left staring at an exposed, unfinished end grain.
- Return at a door: the same idea, but where the molding meets a door casing instead of open wall — it lets the rail terminate cleanly against the trim.
- Termination: the general term for how you finish an end that isn’t tucked into a corner — usually a return or an end cap. Getting this right is what keeps an exposed end from looking unfinished.
- End cap: a pre-shaped piece (or a mitered return) used specifically to cap off an open end so it doesn’t look chopped off mid-wall.
- Transition: any spot where the rail changes direction, height, or meets a different material — stairs, open walls, and door casings are the most common transition points in a typical room.
Getting these details right is what separates a chair rail that looks professionally installed from one that looks like a rushed weekend project.

Chair Rail vs. Wainscoting
People use these terms almost interchangeably, but they’re not quite the same thing.
| Feature | Chair Rail | Wainscoting |
|---|---|---|
| Coverage | Single horizontal strip | Lower portion of wall (from baseboard to chair rail) |
| Protection | Protects from chair backs | Protects entire lower wall |
| Installation | Simple, quick | More complex |
| Cost | Less expensive | More expensive |
| Style | Minimal, refined | Substantial, architectural |

Is Chair Rail Outdated?
Short answer: no. Chair rail is still widely used, but the versions you see in current design tend to look very different from the heavy, ornate molding of decades past.
What’s changed is the execution — thinner profiles, bolder paint pairings, matte black finishes, and integrated lighting have all pulled the chair rail firmly into modern design territory. If your only mental image of a chair rail is a fussy Victorian dining room, it’s worth a second look at how it’s being used now.
Chair Rail Guide: Frequently Asked Questions
The most common standard height is 32 to 36 inches from the finished floor. The one-third rule (one-third of the wall’s total height) is the best starting point — for an 8-foot ceiling, that’s about 32 inches.
It means installing the rail at roughly one-third of the wall’s height. For an 8-foot wall, that’s around 32 inches; for a 9-foot wall, about 36 inches. Some designers use one-quarter of the wall height instead for a more modern, understated look.
No. Despite the name, the height isn’t meant to line up with your actual furniture. It’s a proportion decision for the wall itself, not a furniture-matching exercise.
A chair rail sits at 32–36 inches from the floor. A picture rail sits 10–16 inches below the ceiling and is designed so you can hang artwork from hooks and wire without putting nails in the wall.
Nothing, functionally — they’re the same molding. “Dado rail” is simply the term used in the UK, while “chair rail” is the North American term.
About 32 inches puts the rail at one-third of a 96-inch wall. Most homeowners stay in the 32 to 36 inch range, with 36 inches being the classic traditional choice.
Around 36 inches from the floor works well, though some homeowners push it slightly higher for taller walls.
One-third of a 10-foot (120-inch) wall is 40 inches, which is the best starting point. Many designers go up to about 44 inches if they want a slightly higher line.
Yes. It’s a beginner-friendly weekend project. You’ll need a miter saw, level, tape measure, brad nailer, and construction adhesive — no specialty tools required.
- Wood: traditional, paintable, stainable
- MDF: affordable, smooth, easy to paint
- Polyurethane: lightweight, moisture-resistant
- PVC: waterproof, ideal for bathrooms
Yes. Painting is much easier and cleaner when the molding isn’t already on the wall to work around.
Measure the total linear footage of every wall in the room at your target height, then add 10–15% extra to account for corner cuts, mistakes, and waste. Divide by the board length you’re buying and round up.
Inside and outside corners are typically cut at 45-degree angles on a miter saw so the two pieces meet cleanly. For uneven or out-of-square walls, a coping cut on inside corners often fits tighter than a straight miter.
Most installers either return the molding into the wall with a small mitered end cap, or terminate it flush against the door casing so it looks intentional rather than cut off.
It can be — a monochromatic look is subtle and modern. But painting it a contrasting trim color (often white) is still the more classic choice and helps the molding read as a defined architectural line.
No. Chair rail is still widely used, especially in slimmer, more modern profiles paired with two-tone paint or integrated lighting.
Cost depends heavily on molding material and room size, but DIY installation with basic wood or MDF molding is one of the more budget-friendly trim upgrades you can take on yourself.
Final Thoughts: Getting Chair Rail Height Right
Chair rail height isn’t really about hitting one magic number — it’s about proportion. Start with the one-third rule, adjust for your ceiling height and room type, and always test with painter’s tape before you commit to nail holes.
Once the height is right, the fun part starts: choosing a molding profile, deciding whether to add wainscoting or a bold two-tone paint job, and turning a once-purely-functional strip of wood into one of the best design details in the room.
If you’re planning a bigger wall makeover alongside your chair rail, our home renovation guide and kitchen layout ideas hub have more room-by-room planning resources to help you map out the whole project before you pick up a miter saw.
For a second opinion, This Old House’s guide to choosing interior molding places chair rail about 30 to 36 inches from the floor, in line with the ranges in this guide.