Beadboard Wainscoting Cost, Sizes & Installation: Complete Guide
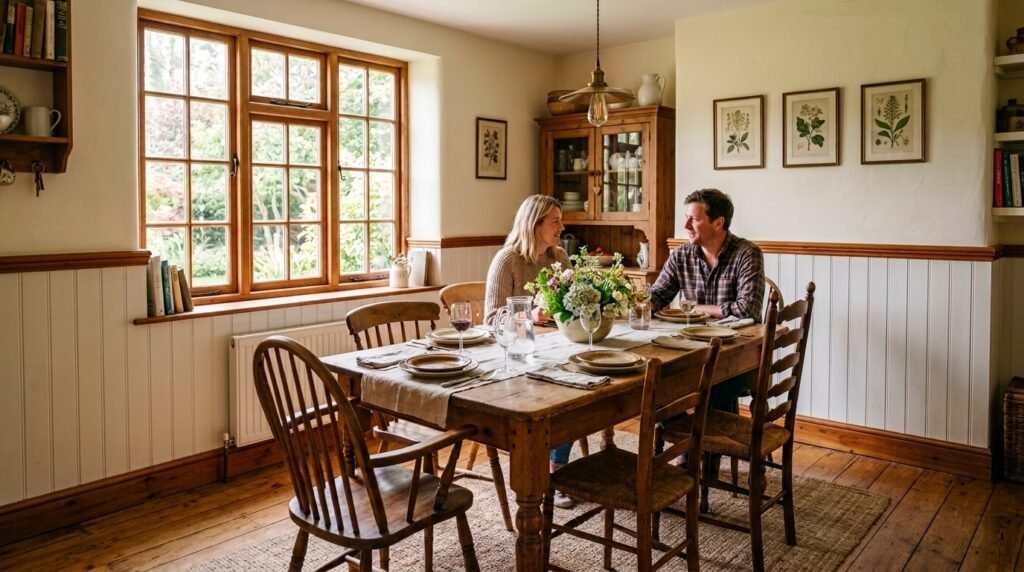
Walk into any charming cottage, coastal cabin, or classic farmhouse kitchen, and there’s a good chance you’ll spot it: rows of narrow vertical grooves running along the lower half of the wall, capped with a neat little rail. That’s beadboard wainscoting, and it might be the single easiest way to add instant character to a room without a full renovation.
If you’ve been searching for beadboard wainscoting cost, panel sizes, or how to actually install the stuff yourself, you’re in exactly the right place. This guide breaks down everything — pricing, materials, sizes, room-by-room ideas, and a full installation walkthrough — in plain, simple language.
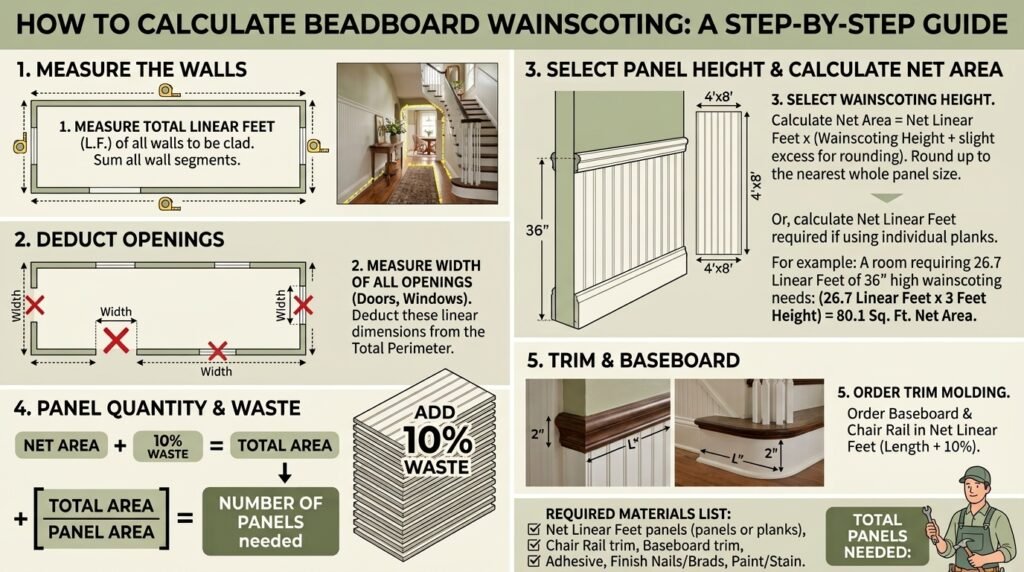
📐 Beadboard Wainscoting Calculator

What Is Beadboard Wainscoting, Exactly?
Let’s clear up a common mix-up first: beadboard vs wainscoting isn’t really an either/or question. Wainscoting is the general term for any decorative paneling applied to the lower portion of a wall. Beadboard is one specific style of wainscoting — the one with narrow vertical planks separated by a small rounded groove, or “bead,” that gives it that classic cottage texture.
So all beadboard is wainscoting, but not all wainscoting is beadboard. Other popular styles include raised panel vs beadboard (more formal, with beveled recessed panels), board and batten vs beadboard (wide flat boards with narrow strips covering the seams, giving a rustic farmhouse feel), and flat panel wainscoting (simple, clean-lined panels favored in more modern or Shaker-style interiors).
Beadboard tends to win out in casual, cottage, and coastal-style homes because of its texture and warmth — it’s the reason you’ll see so much beadboard bathroom and beadboard kitchen styling in classic home magazines.

Beadboard Sizes and Dimensions You Should Know
Before you buy anything, it helps to understand beadboard panel sizes and beadboard dimensions, since these vary depending on whether you’re buying full sheets or individual planks.
- Standard beadboard size typically comes as 4×8 beadboard sheets — 4 feet wide by 8 feet tall — which get cut down to fit your wall. If you’re comparing options, most retailers list 4×8 beadboard panel dimensions alongside the smaller individual plank option, so check both before you buy.
- Individual beadboard planks are usually sold as narrow tongue-and-groove boards, with a common beadboard plank width (sometimes listed as beadboard board width) of around 3.5 inches per board.
- Beadboard thickness ranges from about 1/4 inch for thin sheet paneling up to 3/4 inch for solid wood planks. The beadboard sheet size you choose also affects your beadboard installed width once panels are butted together on the wall, so always dry-fit before cutting your final pieces.
How High Should Beadboard Wainscoting Be?
This is one of the most common questions people ask, and the answer comes down to the classic one-third wall rule. Standard wainscoting height usually falls between 32 inch wainscoting and 36 inch beadboard, which roughly matches standard chair rail height. For a bolder statement, some homeowners go with 42 inch beadboard, 48 inch beadboard, or even 60 inch beadboard for a dramatic half-wall look. As the pros at This Old House explain in their step-by-step beadboard wainscoting guide, the “rule of thirds” isn’t a strict law — testing a couple of heights against your ceiling before committing is always worth the extra ten minutes.

Beadboard Materials: Which One Should You Choose?
Not all beadboard is created equal. Here’s how the main materials stack up:
- MDF beadboard – smooth, affordable, and easy to paint, but not ideal for very wet areas.
- PVC beadboard – fully moisture resistant beadboard, perfect for bathrooms, laundry rooms, and other humid spaces.
- Pine beadboard / wood beadboard – classic, natural-grain look, often sold primed beadboard and ready for painted beadboard finishes, or left as exterior beadboard for porches and covered patios.
If you’re deciding between MDF vs PVC beadboard comparison, think about the room first. Bathrooms and kitchens do best with PVC or well-sealed interior beadboard, while dry living spaces are perfectly fine with MDF or pine.

Where to Use Beadboard: Room-by-Room Ideas
Beadboard is incredibly versatile, and it works just as well as full decorative wall paneling as it does for wall protection in high-traffic spots. Here’s where it shines:
- Bathroom wainscoting and bathroom beadboard – protects walls from splashes while adding cottage charm; pair with PVC for full best beadboard for bathroom walls performance.
- Kitchen wainscoting and kitchen beadboard – popular as a beadboard backsplash, on a kitchen island beadboard wrap, or as full beadboard wall panels along a breakfast nook.
- Mudroom beadboard and entryway beadboard – tough, scuff-resistant, and easy to wipe down near a busy front door.
- Laundry room beadboard – adds texture to an otherwise purely functional space.
- Dining room beadboard – a classic pairing with a chair rail and a bold paint color above.
- Bedroom beadboard and living room beadboard – often used as a full beadboard accent wall behind a bed or sofa.
- Hallway and staircase beadboard – protects high-traffic walls from scuffs and dings.
- Beadboard ceiling – a beautiful, often overlooked application, especially on covered porches or in cottage-style kitchens.

Beadboard Wainscoting Cost: What to Budget For
Let’s talk numbers, since beadboard cost — or beadboard price, depending on how you search for it — is usually the deciding factor for most homeowners.
- Beadboard panels cost typically runs $1.50 to $4 per square foot for basic MDF or PVC sheet paneling, which covers most of your beadboard materials cost for a standard room.
- Solid wood or premium beadboard wainscoting kits can push higher, especially with decorative trim included.
- Beadboard installation cost (labor only) varies by region and room complexity, but professional installation typically adds a noticeable amount on top of material costs.
- Beadboard labor cost is usually higher for bathrooms and kitchens due to cutting around fixtures, outlets, and corners.
- DIY beadboard cost can save a significant chunk of that labor expense if you’re comfortable with basic tools.
- Don’t forget beadboard trim cost — baseboard, chair rail, and cap molding all add to the final total, and skipping them will make the finished look feel unfinished.
If you’re planning a broader renovation and want to budget accurately across materials, a building materials calculator can help you estimate total project costs before you start shopping.

How to Install Beadboard Wainscoting: Step by Step
Ready to tackle install beadboard wainscoting yourself? Here’s the basic beadboard installation guide, step by step:
- Plan your height. Mark your wainscoting height line using the one-third rule as your starting point, then adjust to taste.
- Find your studs. Use a stud finder so your nailing points land on solid framing, not just drywall.
- Dry-fit your panels. Whether you’re using pre-cut beadboard kit pieces or cut beadboard panels from a full sheet, dry-fit everything first to check for gaps around outlets and corners.
- Apply construction adhesive. A bead of construction adhesive on the back of each panel helps it bond securely to the wall.
- Nail it in place. Use finish nails along the top and bottom edges — a brad nailer makes this much faster than doing it by hand.
- Add trim. Install baseboard trim at the bottom and chair rail molding or cap molding at the top to cover raw edges and nail holes.
- Fill, sand, and paint. Fill nail holes with wood putty, sand smooth, then paint beadboard for a clean, finished look.
For a deeper dive into buying, measuring, and finishing considerations, This Old House’s guide on buying, installing, and painting beadboard is a solid resource with plenty of practical detail. And if you’re tackling trim work at the same time, keeping a simple beadboard trim and molding guide on hand — noting your baseboard height, chair rail profile, and cap molding size — makes the whole beadboard wall panel installation guide process much smoother from start to finish.
Beadboard ceilings follow the same basic logic. For beadboard ceiling installation ideas, the main difference is working overhead — panels get nailed into ceiling joists rather than wall studs, so a helper and a few extra hands make the job far less awkward.
Can Beadboard Be Installed Over Drywall?
Yes — beadboard installs directly over existing drywall in most cases, as long as the wall is reasonably flat and sound. You don’t need to strip the wall down to the studs; just make sure your fasteners reach real framing wherever possible for a secure hold.

Beadboard Style Ideas by Design Aesthetic
Beadboard adapts beautifully across design styles, making it one of the most flexible interior wall treatment options out there. If you’re browsing beadboard styles for inspiration, here’s how the main looks break down:
- Cottage style – whitewashed or painted beadboard paired with soft, airy colors; a favorite for cottage style beadboard inspiration boards.
- Farmhouse style / modern farmhouse – beadboard mixed with shiplap and warm wood tones, which is where most farmhouse beadboard wall ideas start.
- Victorian style – taller beadboard runs with more ornate cap molding.
- Coastal interior – light blue or white beadboard, often extended into bathrooms and mudrooms.
- Traditional design / classic wainscoting – neutral tones with clean chair rail detailing for architectural wall detail that never goes out of style.
- Modern minimal spaces – for modern beadboard wainscoting ideas, keep the palette neutral and pair narrow-groove beadboard with simple, low-profile trim rather than ornate molding.

A Word on Home Safety While You Renovate
Renovation projects are the perfect time to check on other overlooked home safety essentials — and smoke detectors top that list. Working smoke alarms cut the risk of dying in a reported home fire by more than half, according to the National Fire Protection Association’s smoke alarm research. Homes without working alarms account for a disproportionately high share of home fire deaths, often simply because a battery had died or a unit was never replaced after its ten-year lifespan.
If you’re pulling down trim or patching walls anyway, it only takes a minute to test your existing alarms — or use a smoke detector calculator to check whether your home has enough coverage in the right spots.

Finishing Touches Around Your Wainscoted Room
A few small additions help your new beadboard wall feel complete, and they’re the kind of details that make a beadboard wainscoting before and after photo genuinely worth sharing:
- If you’re updating trim throughout the room, check a wall panel style and size calculator to keep proportions consistent with your wainscoting height.
- Pair your new wall treatment with fresh LED lighting that’s bright, safe, and efficient to really make the texture pop — this works especially well if you’ve gone with a full beadboard accent wall ideas approach behind a bed or sofa.
- Planning a bigger overhaul? Browse general home renovation ideas for inspiration on what to tackle next.
- If your beadboard project is part of a kitchen refresh, a kitchen layout ideas guide can help you plan the whole space around it.

🔨 Beadboard Wainscoting FAQs
What is beadboard wainscoting?
What are standard beadboard panel sizes?
How high should beadboard wainscoting be?
How much does beadboard wainscoting cost?
Can beadboard be installed over drywall?
What's the best beadboard material for high humidity?
What's the best beadboard for a kitchen backsplash?
Should I buy beadboard sheets or individual planks?
Beadboard vs traditional wainscoting — what's the difference?
Do I need special tools for DIY beadboard installation?

Final Thoughts
Beadboard wainscoting is one of those rare home upgrades that delivers big visual impact without a big price tag or a complicated process. Get your height right, pick a material that matches your room’s humidity level, and take your time with the trim details — that’s really all it takes to get a professional-looking result.
And while you’ve got the tools out for your wainscoting project, take two extra minutes to check your smoke alarms. It’s a small task that pairs perfectly with any home refresh, and it adds real peace of mind to the space you just gave a whole new look.