Crawl Space Encapsulation Guide: Costs, Benefits & Warning Signs
Lower energy bills and a healthier home: what encapsulation involves, what it costs in 2026, and how to tell whether your home needs it.
By Jaweed · Last updated September 23, 2026 · Sources are linked throughout the article.
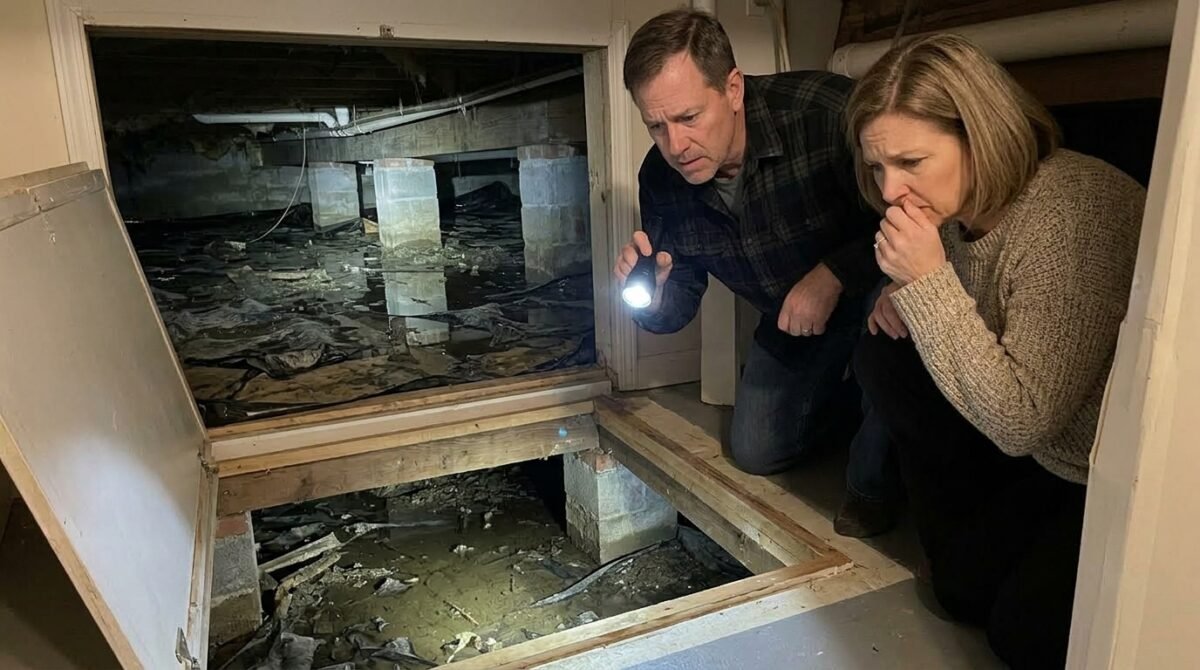
If you’ve never crawled under your own house, count yourself lucky. But even if you never plan to, what’s happening down there in that dark, cramped space affects everything above it — your floors, your air, your energy bills, even your health.
A crawl space is that narrow gap between the ground and your first floor, usually somewhere between 18 inches and 4 feet tall. It’s just tall enough for a plumber or electrician to squeeze through, and just damp enough to cause real trouble if nobody’s paying attention.
Here’s the thing most homeowners don’t realize: a neglected crawl space doesn’t just smell bad. It can quietly wreck your floors, feed mold into your air ducts, and force your HVAC system to work overtime. The fix — crawl space encapsulation — sounds intense, but once you understand what it actually involves, it starts to make a lot of sense.
In this guide, we’ll walk through exactly what encapsulation is, how it’s different from a simple vapor barrier, what it costs in 2026, and how to tell if your home actually needs it. Done right, it can meaningfully cut heating and cooling costs and make the space healthier and drier. Let’s get into it.
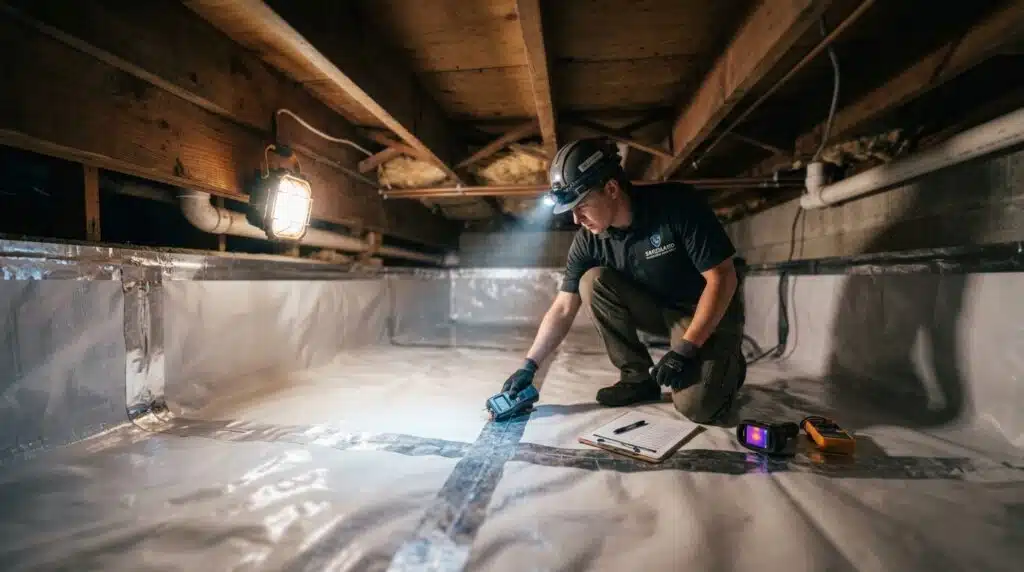
A fully encapsulated crawl space, sealed and ready to protect the floors above it.
Crawl Space vs. Basement: What's the Difference?
Before we go further, let’s clear up some confusion. Crawl spaces and basements both sit beneath your home, but they’re built for completely different purposes.
| Feature | Crawl Space | Basement |
|---|---|---|
| Height | 18 inches – 4 feet | 7 – 10 feet (stand-up height) |
| Cost to Build | Lower | Higher |
| Storage | Limited | Full living or storage space |
| Resale Value | Less impact in basement-heavy markets | Adds significant value |
| Common Use | Utility access, light storage | Living space, storage, workshops |
Crawl space foundations account for about 9.9% of new U.S. homes, according to NAHB’s analysis of 2023 Census construction data, and they’re especially common in earthquake-prone regions, where elevating a house on blocks, stone, or brick piers helps it flex during ground movement instead of cracking.
If your home has a low-clearance space instead of a full basement, everything in this guide applies directly to you.

Two very different foundations, two very different maintenance needs.
Why Moisture Is the #1 Enemy of Every Crawl Space
If there’s one villain in this whole story, it’s moisture. It sneaks in more ways than you’d think:
- Poor exterior drainage — clogged gutters, missing downspout extensions, or bad grading around the foundation
- Groundwater seeping straight through the foundation walls
- Humid outside air pouring in through open vents
- Slow plumbing leaks that go unnoticed for months
- Condensation forming on cool pipes and surfaces
The EPA recommends keeping indoor relative humidity between 30% and 50% to keep mold in check. In a crawl space, you want to stay under 60% humidity — once it creeps higher than that, mold and mildew have everything they need to thrive.
Signs You Might Have a Moisture Problem
| Sign | What It Usually Means |
|---|---|
| Musty smell | Mold or mildew growth |
| Wood rot | Prolonged moisture exposure |
| White, powdery residue on soil | Alkaline salts left behind by evaporating moisture |
| Warped floors above | Moisture damage to floor joists |
| Pest activity | Damp environments attract termites and rodents |
| Rising energy bills | Unconditioned, moist crawl spaces make your HVAC work harder |
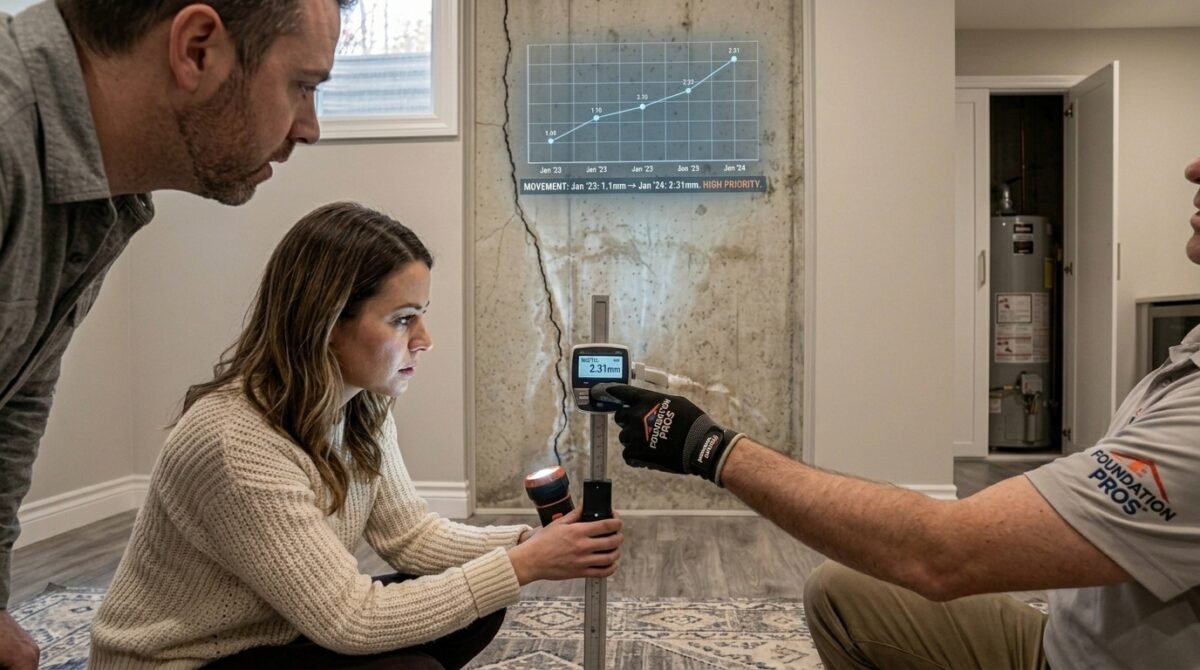
If any of those sound familiar, it’s worth checking under there sooner rather than later. And if you notice cracking along the way, our guides on basement wall cracks and foundation cracks walk through what’s normal and what’s a red flag.

Left unchecked, moisture damage can travel from the soil straight into your floor joists.
Vapor Barrier vs. Crawl Space Encapsulation: What's the Difference?
A lot of homeowners use these two terms like they’re the same thing. They’re not — and knowing the difference will save you from overpaying or underprotecting your home.
| Feature | Vapor Barrier | Crawl Space Encapsulation |
|---|---|---|
| What it is | A thick plastic sheet covering the ground (sometimes partial walls) | A full system: vapor barrier + wall insulation + sealed vents + dehumidifier |
| Scope | Basic ground moisture control | Full moisture, temperature, and pest control |
| Cost | Usually a fraction of full encapsulation (depends on size and prep) | $5,000 – $15,000 |
| Best For | Homes without major water issues | Homes with high humidity, mold, or pest problems |
If your crawl space already has a vapor barrier and you’re just deciding whether to go further, our vapor barrier and crawl space guide breaks down when a barrier alone is enough.

💧 Quick Answer
A vapor barrier is one piece of the puzzle. Encapsulation is the whole system built around that barrier — think of the vapor barrier as the foundation of a much bigger project.
Vapor Barrier Thickness (Mil) Guide
Vapor barrier thickness is measured in mils — one mil equals 1/1000th of an inch. The International Residential Code (IRC) requires a minimum of 6 mils for ground cover in crawl spaces, but code minimum and long-term durability are two very different things.
| Thickness | Best For | Lifespan | Notes |
|---|---|---|---|
| 6 mil | Code minimum, temporary DIY fixes | 1 – 5 years | Tears easily, not very durable |
| 10 mil | Light-use areas | 5 – 10 years | Still not strong enough for most crawl spaces |
| 12 mil | Standard professional-grade | 10 – 15 years | The sweet spot for most homes |
| 16 – 20 mil | High-traffic, radon resistance, long-term | 15 – 25+ years | Heavy-duty and puncture-resistant |
Lifespans are general installer estimates, not lab test results. Real-world life depends on foot traffic, soil conditions, and installation quality, so check the manufacturer’s warranty.
Our take: 12 to 20 mil is worth the extra upfront cost. It resists punctures from foot traffic and stored items far better than the thin stuff, and it holds up longer against the constant contact with damp soil.

🌿 Pro Tip
Upgrading from 6 mil to a 12–20 mil liner usually adds cents, not dollars, per square foot in materials (Angi lists 20-mil liner at about $0.50–$0.70 per sq ft). A torn 6-mil barrier means redoing the whole job in a few years — the thicker liner almost always wins on cost-per-year.
What About Permeance Ratings?
For encapsulation-grade liners, the ASTM E96 vapor transmission test measures how much moisture actually passes through the material. Under the building code, a material rated 0.1 perm or less is classed as a Class I vapor retarder, and ASTM E1745, the standard for plastic vapor retarders in contact with soil, also requires 0.1 perms or lower. Many premium liners test well below that, so ask for the product’s data sheet. The lower the perm rating, the better the barrier blocks moisture — it’s one more thing worth asking a contractor about before you sign anything.

Heavy-duty liners hold up far longer than a code-minimum 6 mil sheet.
What's Actually Included in a Full Encapsulation System
When a contractor says “encapsulation,” here’s what should actually show up on the invoice:
- Vapor barrier — heavy-duty polyethylene (12–20 mil) covering the floor and walls
- Sealed seams — taped and sealed to the walls and support piers
- Wall insulation — rigid foam or spray foam applied to the foundation walls
- Vent sealing — closing off the old crawl space vents
- Dehumidifier — to keep humidity in the safe range year-round
- Drainage system — perimeter drainage and a sump pump where needed
Skip any one of these, and you’re really just left with a fancier vapor barrier — not true encapsulation.
Crawl Space Encapsulation Costs in 2026
| Cost Factor | Typical Range |
|---|---|
| National average | About $5,500 |
| Typical project range | $5,000 – $15,000 |
| Basic encapsulation, per sq ft | $2 – $4 |
| Extensive work (repairs, drainage), per sq ft | $3 – $10 |
| Crawl space dehumidifier (unit) | $800 – $1,200 |
| Permits | $50 – $250 |
| Labor share of total cost | 50% – 70% |
Source: Angi crawl space encapsulation cost guide (updated July 2026). Prices vary by region and contractor.
These numbers move around based on your crawl space’s size, how much moisture damage already exists, and your local labor rates. Getting two or three written quotes, each listing the same items (liner thickness, wall insulation, vent sealing, dehumidifier, drainage), is the best way to compare them fairly.
Because encapsulation directly affects your heating and cooling costs, it’s worth running the numbers through our energy savings calculator to see roughly how long the project would take to pay for itself through lower utility bills.
Choosing the Right Insulation for Your Crawl Space
| Insulation Type | Best For | Moisture Resistance |
|---|---|---|
| Closed-cell spray foam | Crawl space walls | Excellent — repels moisture |
| Rigid foam board | Walls and floors | Excellent — moisture-resistant |
| Batt insulation | Floors, if walls can’t be insulated | Poor — absorbs moisture |
| Bubble or reflective insulation | Easy wall installation | Moderate |
For crawl space walls, ENERGY STAR’s recommended R-values (based on the 2021 IECC) are:
- Zone 3: R5 insulative wall sheathing or R13 batt
- Zones 4A and 4B: R10 sheathing or R13 batt
- Zones 4C and 5–8: R15 sheathing or R19 batt
In a damp crawl space, rigid foam or closed-cell spray foam is the safer choice; batts only make sense where they are fully protected from moisture. According to ENERGY STAR, sealing air leaks and adding insulation can save up to 10% on annual energy bills.

Rigid foam board is one of the most moisture-resistant options for foundation walls.
Crawl Space Ventilation: Should Vents Be Open or Closed?
This is one of the most searched crawl space questions out there, and the honest answer is: it depends on what kind of crawl space you have.
A traditional vented crawl space relies on outside air moving through screened vents to keep things dry. The problem is that this air isn’t always dry — in humid climates, opening vents in summer actually pulls moist air in, which is the opposite of what you want.
Vented Crawl Space: Seasonal Vent Settings
- Summer: many building scientists now recommend keeping vents closed, since warm, humid outside air condenses on cooler crawl space surfaces
- Winter: vents are traditionally left open to prevent moisture buildup from indoor sources, though this also lets in cold air that can freeze pipes
- Shoulder seasons: this is when open vents cause the least harm, since indoor-outdoor temperature and humidity gaps are smaller
An encapsulated or sealed crawl space skips this seasonal guessing game entirely. Once the vents are permanently closed and sealed, a dehumidifier takes over full-time humidity control — no more wondering whether today is a vents-open or vents-closed day.
If you’re not ready for full encapsulation, a crawl space ventilation fan paired with a humidistat is a middle-ground option. It only runs when humidity climbs past a set threshold, which cuts down on the guesswork without the cost of a full system.
Crawl Space Dehumidifiers: Sizing and Ideal Humidity Levels
Once a crawl space is sealed, a dehumidifier becomes the single most important piece of equipment down there. It’s what keeps humidity in the safe zone day after day, regardless of the weather outside.
| Crawl Space Size | Suggested Dehumidifier Capacity |
|---|---|
| Under 1,000 sq ft | 30–50 pints per day |
| 1,000 – 1,500 sq ft | 50–70 pints per day |
| 1,500 – 2,500 sq ft | 70–100 pints per day |
| 2,500+ sq ft or commercial | Multiple units or a ducted commercial dehumidifier |
Ideal crawl space humidity sits between 30% and 55%. Anything consistently above 60% is a green light for mold, wood rot, and pests to move in. A simple hygrometer — the same kind used for wine cellars or humidors — is an inexpensive way to keep an eye on things without crawling under the house every week.
Look for a dehumidifier with an automatic pump, a built-in humidistat, and low-temperature operation, since crawl spaces run cooler than a basement and cheaper units can struggle or freeze up down there.
Common Crawl Space Problems and Solutions
| Problem | Cause | Solution |
|---|---|---|
| Musty odors | Mold or mildew from moisture | Vapor barrier + dehumidifier |
| High humidity | Outside air entering through vents | Seal vents, encapsulate |
| Water intrusion | Poor drainage, groundwater | Regrade, add gutters, install a sump pump |
| Pest entry | Openings and moisture attracting pests | Seal gaps, reduce moisture |
| Cold floors | Lack of insulation | Insulate walls or floor |
| Radon entry | Soil gas rising through the ground | Test first (EPA radon guidance); sealed thick liner + radon mitigation system if levels are high |
Pest issues, in particular, are worth taking seriously — a damp crawl space is prime real estate for termites. If you spot mud tubes along the foundation, check out our termite mud tube guide to confirm what you’re looking at before it spreads further.
Crawl Space Drainage: French Drains and Sump Pumps
Insulation and vapor barriers handle humidity, but they can’t stop actual water intrusion on their own. If your crawl space deals with groundwater or seasonal flooding, drainage has to come first.
French Drains and Interior Drain Tile
A crawl space French drain is a perforated pipe set into a gravel-filled trench along the interior perimeter. It intercepts water before it pools on the floor and channels it toward a collection point — usually a sump pump basin.
Sump Pumps
A sump pump sits in a basin at the lowest point of the crawl space and automatically pumps out collected water before it can rise. For crawl spaces with a history of flooding, a battery backup sump pump is worth the extra cost — it keeps working even if a storm knocks out the power.
Outside the crawl space itself, simple fixes often make the biggest difference: extending downspouts at least 4 to 6 feet from the foundation, regrading soil so it slopes away from the house, and clearing gutters twice a year all reduce how much water reaches the crawl space in the first place.
Crawl Space Mold: Types, Removal, and Prevention
Mold in a crawl space usually shows up as fuzzy white, gray, green, or black patches on wood framing, insulation, or the underside of subflooring. Black mold gets the most attention, but any mold growth is a sign that moisture levels have been too high for too long.
How to Remove Crawl Space Mold
- Identify and fix the moisture source first — cleaning mold without addressing humidity just invites it back
- Scrub affected wood with a stiff brush and a mold-specific cleaning solution, not just bleach, which doesn’t fully kill mold on porous wood
- Increase airflow or run a dehumidifier while the area dries completely
- For widespread or black mold, professional mold remediation is worth the cost — crawl spaces are tight, poorly lit, and easy to under-treat
Prevention comes down to the same fundamentals covered throughout this guide: control humidity, fix drainage issues, and seal the space so outside moisture can’t keep feeding new growth.
As a rule of thumb, the EPA’s mold and moisture guide says you can usually handle a moldy area smaller than about 10 square feet yourself; larger areas call for its guidance on bigger cleanups or a qualified professional.
Dry Rot vs. Wet Rot: What's Damaging Your Floor Joists
Not all wood rot in a crawl space is the same, and knowing the difference helps you understand how serious the damage really is.
| Type | Cause | What It Looks Like |
|---|---|---|
| Wet rot | Constant, direct moisture contact | Soft, spongy, darkened wood that crumbles easily |
| Dry rot | Fungal growth that can spread even after the source dries | Brittle, cracked wood in a cube-like pattern, sometimes with fine white or gray fungal strands |
Wet rot generally stays localized to the damp area and stops spreading once the wood dries out. Dry rot is more concerning — the fungus can travel through masonry and continue spreading through a structure even after the original moisture source is gone, which is why it often needs professional treatment rather than a simple dry-out.
If you’re seeing rot near foundation walls, it’s worth checking those walls directly too — our guide on basement wall cracks covers how to tell a cosmetic crack from a structural one.
Crawl Space Doors and Access Points
Your crawl space access door might be the smallest part of this whole system, but a poorly sealed one undoes a lot of the work everything else is doing. Gaps around an old, warped, or unsealed crawl space door let in exactly the humid air and pests you’re trying to keep out.
- Insulated crawl space doors help maintain a stable temperature and reduce condensation right at the entry point
- Weatherstripping around the door frame closes gaps that let in air, insects, and small rodents
- Metal or heavy-duty PVC doors resist warping better than wood over the long run, especially on exterior access points exposed to weather
- A properly sized opening — check your local code for minimum crawl space access dimensions — keeps the space usable for future inspections and repairs
Sealing gaps around access points is the same principle behind sealing other entry points on your home. If you’re already thinking about air sealing, our garage door bottom seals guide covers a similar fix for a different — but just as common — gap in the building envelope.
Crawl Space Pests: Rodents, Snakes, and Termites
A damp, dark, rarely-visited crawl space is basically an open invitation for pests. The most common uninvited guests fall into a few categories:
- Rodents — mice and rats look for insulation to nest in and often chew through wiring, which adds a fire risk on top of the nuisance
- Snakes — usually just passing through in search of the rodents mentioned above, but understandably alarming to find
- Termites — moisture-damaged wood is a termite magnet, and a crawl space is one of the first places infestations start
- Spiders and general insects — drawn in by humidity and the other pests they feed on
Sealing entry points — vents, the access door, gaps around pipes and wiring penetrations — does double duty here. It keeps out both moisture and the pests that moisture attracts.
Musty Odors and Crawl Space Air Quality
Here’s something a lot of homeowners don’t connect: the air in your crawl space doesn’t necessarily stay down there. Through a phenomenon called the stack effect, air from the crawl space can rise up through gaps in flooring and get pulled into your living space — musty smell included.
If you’ve noticed a persistent musty odor in your house that seems to come from nowhere in particular, the crawl space is worth checking before you start blaming furniture or carpet. Sealing the space and controlling humidity usually clears up the smell at the source, rather than just masking it.
Crawl Space Heating and Frozen Pipe Prevention
Pipes running through an unconditioned, vented crawl space are exposed to much colder temperatures than the rest of your home — which makes them a common freeze point during winter cold snaps.
- Pipe insulation sleeves are a cheap, simple first line of defense for exposed water lines
- Heat tape or heat cable can be added directly to vulnerable pipe sections in especially cold climates
- Closing and sealing vents, as covered earlier, keeps the ambient crawl space temperature higher overall
- A thermostat-controlled crawl space heater can be used as a backup during extreme cold snaps, though it shouldn’t be needed once a space is properly encapsulated and insulated
Encapsulation tends to solve this problem indirectly — once the space is sealed and insulated, it stays noticeably warmer than a vented crawl space, and frozen pipe calls become far less common.
Yearly Crawl Space Inspection Checklist
A yearly walk-through, or a professional inspection every few years, catches small problems before they turn into expensive ones. Bring a flashlight, a hygrometer, and a screwdriver, and check:
- Standing water, damp soil, or water stains on the liner or walls
- Humidity reading (aim to stay under 60%)
- Torn, loose, or unsealed liner seams
- New cracks in foundation walls or support piers
- Soft wood: press a screwdriver into joists and sill plates; if it sinks in easily, look for rot
- Mud tubes, droppings, or chewed insulation and wiring
- Sagging joists, or gaps between beams and their support posts
If floors above the crawl space feel bouncy or visibly sag, support posts or beams may have shifted, settled, or been weakened by moisture. The step-by-step guide below explains how sagging floors are usually fixed. Have a structural engineer or foundation specialist confirm the cause first, because sagging floors sometimes point to a bigger foundation issue. If you’re seeing movement at the base of the house itself, our foundation cracks guide explains how to tell cosmetic cracks from structural ones.

How to Fix a Sagging Floor Over a Crawl Space: Step by Step
Fixing a sagging floor over a crawl space means finding the cause, supporting the load temporarily, and then installing permanent support. The steps below describe how the job is usually done so you can plan it or discuss it with a contractor.
Safety first: Jacking a house carries real risk of structural damage and injury. Many areas require a permit for structural work, and posts, footings, and beams must meet local code. Have a structural engineer or foundation specialist confirm the cause and approve the plan before you lift anything. If you are not comfortable with any step, hire a licensed contractor.
Step 1: Identify the Cause of the Sag
Before installing supports, inspect the crawl space with a flashlight and a level:
- Rotten or weakened joists: moisture, wood rot, or termite damage has compromised the floor joists.
- Over-spanned joists: the joists or center beam are undersized or span too far without support.
- Sinking pier footings: concrete pier blocks or posts under the center beam have settled into soft soil.
- Subfloor damage: the subfloor itself has rotted or delaminated even though the joists are sound.
Step 2: Gather Tools and Materials
| Material / Tool | Purpose |
|---|---|
| Adjustable steel screw jacks (rated) | Permanent or temporary load bearing |
| Pressure-treated posts (4x4 or 6x6) | Vertical support columns, where code allows |
| Concrete footing pads | Solid base so posts can’t sink into soil |
| Hydraulic bottle jack (rated for the load) | Slowly lifting the beam and joists |
| Hardwood shims and steel plates | Fine adjustments and spreading the load |
| Laser or long framing level | Tracking floor elevation |
Step 3: Prepare Solid Concrete Footings
Never set jack posts directly on bare soil or thin pavers; the weight will push them into the ground.
- Dig to firm soil: excavate to undisturbed subsoil beneath the sag. Required depth and footing size depend on your soil and local code (including frost depth), so confirm with your building department or engineer.
- Pour or place the footing: pour a reinforced concrete pad sized to the load, or use a rated pre-cast pier block on compacted gravel if your engineer approves it.
- Let it cure: give poured concrete time to gain strength before loading it; follow the mix manufacturer’s guidance.
Step 4: Lift the Floor Slowly
Lifting too fast can crack drywall and tile, bind framing, and knock door frames out of square.
- Position the jack on the cured footing, under a steel plate or short timber.
- Spread the load with a temporary beam across the affected joists.
- Lift in small steps: a common rule of thumb is no more than about 1/8 inch per day, but follow your engineer’s schedule.
- Check upstairs doors, walls, and floor level after every adjustment.
Step 5: Install Permanent Support or Sister the Joists
Option A: Permanent adjustable steel posts
Once the floor is level, replace temporary jacks with code-approved adjustable steel posts on the footing, and fasten the post top plate to the beam with the connectors the manufacturer specifies.
Option B: Sister damaged joists
If individual joists are cracked or sagging, lift each one back to level, then fasten a new full-length joist of the same size alongside it using construction adhesive and structural bolts or screws in a staggered pattern. Your engineer can confirm fastener size and spacing, and whether badly rotted joists must be replaced instead.
Step 6: Fix the Moisture That Caused It
If moisture rotted the wood or softened the soil, the floor will sag again unless you control the crawl space environment:
- Vapor barrier: cover all exposed soil. The code minimum is 6 mil, but a 12–20 mil liner is far more durable (see the thickness guide above).
- Divert exterior water: extend downspouts at least 4–6 feet from the foundation and grade soil to slope away from the house.
- Control humidity: seal the vents and run a crawl space dehumidifier as part of encapsulation, or use a humidistat-controlled ventilation fan in a vented crawl space.
Crawl Space Conversion: Slab, Basement, or Stay As-Is?
Every so often, a homeowner asks whether it’s worth converting a crawl space into something more useful — a slab foundation or even a full basement. It’s possible, but it’s a major structural undertaking, not a weekend project.
| Option | What’s Involved | Typical Cost Range |
|---|---|---|
| Crawl space to basement conversion | Excavating below the existing foundation, underpinning walls, new drainage and waterproofing | About $83,000 – $128,000 (Angi average ≈ $105,000) |
| Crawl space to slab conversion | Filling the space and pouring a new concrete slab | Varies widely; needs a structural engineer’s assessment and local quotes |
| Encapsulation (no conversion) | Sealing and conditioning the existing crawl space | $5,000 – $15,000 |
Basement conversion estimate: Angi crawlspace-to-basement conversion cost guide. Every conversion needs engineered plans and permits.
For most homeowners, encapsulation delivers the bulk of the benefit — dry, healthy, energy-efficient space — at a fraction of the cost and disruption of excavating for a basement. Conversion tends to make the most financial sense only when you specifically need the extra square footage and plan to stay in the home long enough to recoup the investment.

A clean, dry, fully conditioned crawl space is the end goal of encapsulation.
Should You Encapsulate? Warning Signs to Watch For
Encapsulation isn’t always necessary — but if you’re noticing several of these at once, it’s time to take a closer look:
- Persistent musty smells, even with the vents open
- Visible mold on wood, insulation, or ductwork
- Humidity readings consistently above 60%
- Water stains, standing puddles, or damp soil
- Ongoing pest activity
- Energy bills that keep climbing without an obvious reason
If your crawl space only has one minor, isolated issue, a simple vapor barrier and better ventilation might be all you need. Full encapsulation makes the most sense when several of these problems show up together.
Safety Guidelines Before You Go Under the House
Crawl spaces mix tight quarters with electrical wiring, gas lines, and sometimes standing water — a combination that deserves real caution, whether you’re a homeowner taking a look or hiring a crew to do the work.
⚠️ Before You Go Under the House
Stop and call a professional if you smell gas, notice sewage odors, or see significant structural sagging — don’t continue further into the space.
Electrical and Utility Safety
- Never touch exposed wiring in a damp crawl space — water and electricity are a dangerous mix
- Have an electrician inspect any wiring that runs through the crawl space before encapsulation begins, especially if it looks old or frayed
- Shut off power to the area at the breaker if you need to work near outlets, junction boxes, or light fixtures
- If gas lines run through the space, avoid puncturing anything with tools, staples, or fasteners
Working Safely in the Space
- Wear a respirator mask, gloves, and eye protection — mold spores and insulation particles aren’t something to breathe in
- Bring a battery-powered light rather than relying on an extension cord near damp soil
- Test for standing water or soft, unstable ground before crawling forward
- Never work alone in a crawl space — have someone nearby who knows you’re under there
The OSHA guidelines on confined spaces apply to professional crews working in tight areas like crawl spaces, and they’re a good reminder for DIYers too: ventilation, lighting, and having a second person aware of your location matter more than most people assume.

Basic PPE is non-negotiable once mold, insulation dust, or tight quarters are involved.
Frequently Asked Questions
What is the minimum vapor barrier thickness required by code?
The IRC requires a minimum of 6 mils for ground cover in crawl spaces. That said, most professionals recommend 10 to 20 mil for real-world durability, since thin barriers tear easily under foot traffic.
Is a vapor barrier the same as encapsulation?
No. A vapor barrier is just the plastic sheet covering the ground. Encapsulation is the full system — vapor barrier, wall insulation, sealed vents, and a dehumidifier working together.
How much does crawl space encapsulation cost?
Angi puts the national average at about $5,500, with most projects between $5,000 and $15,000 depending on square footage, repairs needed, and local labor rates.
Can I install a vapor barrier myself?
Yes, a basic vapor barrier is a doable DIY project for most homeowners. Full encapsulation, though, is usually best left to professionals because of the sealing, insulation, and dehumidification work involved.
How do I know if my crawl space has a moisture problem?
Watch for musty smells, visible mold, wood rot, white powdery residue on the soil, humidity readings above 60%, or increased pest activity. Any of these is worth investigating further.
How long does a vapor barrier last?
As a rough installer estimate, a thin 6-mil sheet may need replacing within a few years, while a sealed 12–20 mil liner often lasts 15 years or more. Actual life depends on foot traffic, soil conditions, and installation quality, so check the manufacturer’s warranty.
Do crawl space vents need to be sealed during encapsulation?
Yes. Sealing the vents is a core part of encapsulation — it stops humid outside air from entering the space, which is one of the biggest drivers of moisture problems in the first place.
Will encapsulation actually lower my energy bills?
Often, yes. Sealing and insulating the crawl space keeps conditioned air from escaping through the floor and reduces the load on your HVAC system. ENERGY STAR estimates that air sealing and adding insulation can save up to 10% on annual energy bills; your results depend on climate, house, and the starting condition of the crawl space.
Should crawl space vents be open or closed in summer?
Many building scientists now recommend closing vents in summer, since warm, humid outside air condenses on the cooler surfaces inside the crawl space. A fully encapsulated, sealed crawl space avoids this seasonal question entirely.
What size dehumidifier does a crawl space need?
It depends on square footage. As a rough guide, a space under 1,000 square feet typically needs a 30–50 pint-per-day unit, while larger spaces up to 2,500 square feet may need 70–100 pints per day or multiple units.
What's the difference between dry rot and wet rot?
Wet rot comes from constant direct moisture and stays localized, softening and darkening the wood. Dry rot is fungal and can keep spreading through a structure even after the original moisture source dries up, which makes it the more serious of the two.
Do I need a sump pump in my crawl space?
If your crawl space experiences standing water or seasonal flooding, yes — a sump pump paired with a French drain is the standard way to remove water before it damages framing or feeds mold growth.
Can crawl space moisture cause a musty smell in my house?
Yes. Through the stack effect, air from a damp crawl space can rise into your living areas, carrying that musty odor with it. Sealing the crawl space and controlling humidity usually resolves the smell at its source.
How do I keep crawl space pipes from freezing in winter?
Insulate exposed pipes, consider heat tape in especially cold climates, and seal and close crawl space vents to keep ambient temperatures higher. A fully encapsulated crawl space largely eliminates this problem on its own.
Can you convert a crawl space into a basement?
Technically yes, but it means excavating below the existing foundation and underpinning the walls, a major engineered project. Angi puts the average around $105,000. For most homes, encapsulation delivers most of the benefit at a fraction of the cost.
What causes sagging floors above a crawl space?
Usually shifted, settled, or moisture-weakened support posts and beams. Adjustable steel jacks can often correct it, but a structural professional should confirm the underlying cause first.
The Bottom Line – Crawl Space Encapsulation
A crawl space is easy to forget about — until it starts costing you money and comfort.
Moisture, mold, and poor insulation down there don’t stay down there; they work their way up into your floors, your air, and your utility bills.
Whether you end up needing a simple vapor barrier or a full encapsulation system, the goal is the same: keep that space dry, sealed, and out of the way of the problems it’s prone to causing. A little attention now, and a lot of comfort — and savings — later.
Not sure where to start? Take a look under the house, run through the warning signs above, and if you’re still unsure, a local crawl space specialist can usually give you a straight answer during a quick inspection. And if foundation cracks or drainage issues turn up along the way, our guides on well-draining soil and foundation cracks are good next stops.