💧
Paint Drying Time Humidity – 50% RH Ideal, 70% Doubles
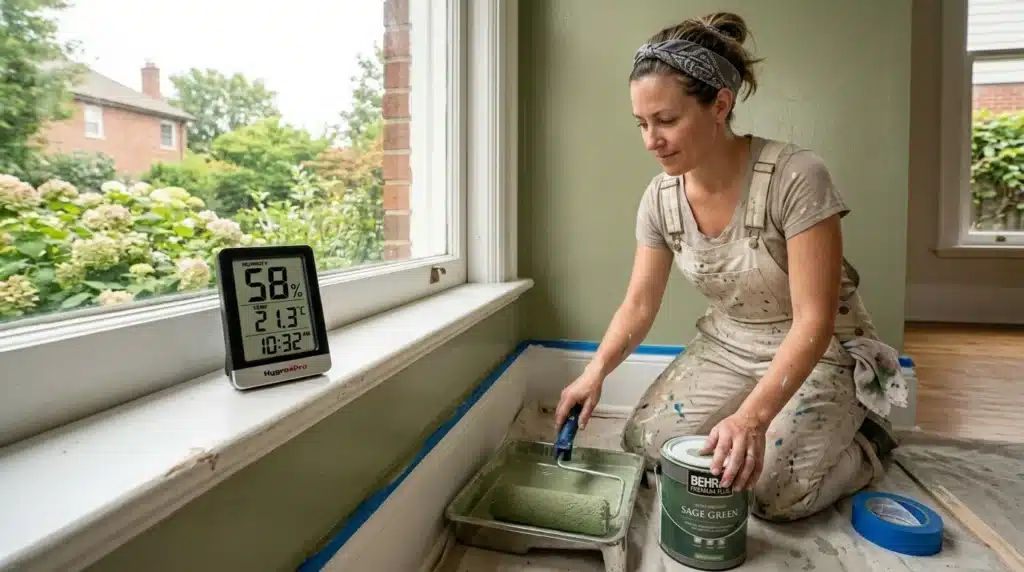
You finish a wall, step back proud, and hours later it is still tacky to the touch. Sound familiar? Nine times out of ten, the culprit is not the paint, it is the humidity in the air. Moisture in the air quietly doubles your drying time and can even wreck the finish. The good news: once you understand how paint drying time and humidity work together, you can plan around it and get a smooth, durable result every time. Before you even open the can, our paint calculator helps you buy the right amount so you are not left with half-dry leftovers.
Understanding Humidity and Paint Drying
Project Overview & Key Takeaways:
In this guide I will explain, in plain English, exactly how humidity slows drying, share real drying-time numbers, and give you practical tips to paint successfully even in a damp, humid house. Let us get your paint dry properly.
💡 Pro Tip: Maintaining a target humidity level of 50% relative humidity ensures optimal drying times, preventing tacky finishes and film failure during curing.

⏱️
Drying Times Calculator in High Humidity
Estimate how relative humidity affects touch, recoat, and cure times for your painting project. Select your paint type, temperature, and target humidity level below:
Estimated Drying Schedule
Dry to Touch
2–4 Hours
Ready to Recoat
8–10 Hours
Full Cure
21–30 Days
⚠️ High Humidity Warning: Recoat time roughly doubled. Ensure good ventilation or run a dehumidifier before applying the next coat.

The Short Answer: How Humidity Affects Paint Drying
Paint dries as water or solvent evaporates into the air. When the air is already damp, it cannot absorb much more moisture, so drying slows down dramatically.
40% – 50%
Ideal Range
70% RH
2x Dry Time
> 85% RH
Do Not Paint
Push past the ideal range and things get sticky — literally. Raising relative humidity from 40% to 70% roughly doubles how long latex paint takes to dry and recoat. Above 85% relative humidity, paint should not be applied because the film may never harden properly.
Manufacturer Warning: According to Sherwin-Williams, applying paint in high humidity stops a proper film from forming during early curing, which leads to long-term adhesion issues and increased mildew risks.

Why Does Humidity Slow Paint Drying? (The Science)
Think of the surrounding air like a sponge. On a dry day, that sponge has plenty of room to soak up the moisture escaping from your paint. On a humid day, the sponge is already saturated, so it takes far longer for the water to evaporate into the room.
🧪 Water-Based vs. Oil-Based Paint Behavior:
This hits water-based (latex and acrylic) paints hardest because they rely almost entirely on rapid water evaporation to dry.
Oil-based (alkyd) paints cure through a slower chemical reaction with oxygen, making them slightly more forgiving during initial drying, although they still require several weeks to cure completely.
In extreme dampness—over roughly 85% relative humidity—paint may fail to form a continuous protective film at all, leading to severe blistering, peeling, or a tacky finish that never fully hardens.
This hits water-based (latex and acrylic) paints hardest because they rely almost entirely on rapid water evaporation to dry.
Oil-based (alkyd) paints cure through a slower chemical reaction with oxygen, making them slightly more forgiving during initial drying, although they still require several weeks to cure completely.
In extreme dampness—over roughly 85% relative humidity—paint may fail to form a continuous protective film at all, leading to severe blistering, peeling, or a tacky finish that never fully hardens.

Paint Drying Time Chart (By Humidity)
Numbers make this real. Here is a comparison chart showing drying time differences between normal conditions and high humidity. Always check your specific paint can label, as times vary based on temperature, humidity, and coat thickness.
| Paint Type | Dry to Touch (Normal) | Dry to Touch (Humid) | Recoat (Normal) | Recoat (Humid) | Full Cure |
|---|---|---|---|---|---|
| Latex / Water-Based | 1–2 hours | 2–4+ hours | 4 hours | 8–10+ hours | 21–30 days |
| Oil-Based / Alkyd | 6–8 hours | 8–12+ hours | 24 hours | 24+ hours | 7–14 days |
💡 Key Takeaway: In very high relative humidity (over 70% to 90%), drying times easily double or more. When in doubt, wait significantly longer than the minimum recoat time listed on the can before applying a second coat.

"Dry to Touch" vs "Recoat" vs "Fully Cured"
People mix these three stages up all the time, which often leads to ruined paint jobs. Understanding the difference is crucial for a lasting finish:
The Three Stages of Paint Drying
●
Dry to Touch: The outer surface feels dry, but the underlying paint layer is still soft and easily dented.
●
Recoat (Dry to Handle): The first coat has stabilized enough to safely apply a second coat without lifting or damaging the initial layer.
●
Fully Cured: The paint film has achieved maximum hardness, adhesion, and durability. Only at this stage should you scrub walls or push furniture against them.
💡 Why the Difference Matters: This is why understanding dry time versus cure time is essential. Latex paint can feel dry to the touch in as little as an hour, but it can take three to four weeks to fully cure. Avoid washing walls or leaning furniture against painted surfaces until that curing window has passed.

Latex vs Oil-Based Paint in Humidity
So which should you reach for in a humid room? Oil-based paints are generally more forgiving during initial drying because they depend less on water evaporation. However, they carry stronger fumes, take far longer to cure completely, and require harsh solvents for cleanup.
💡 The Winner for Homeowners:
For most projects, a high-quality water-based acrylic latex remains the superior all-round choice—specifically a moisture- or mildew-resistant formula engineered for high-humidity spaces. Leading brands like Sherwin-Williams, Benjamin Moore, and Behr offer specialized bathroom and kitchen lines designed to perform in humid conditions. Always pair them with a quality primer for maximum adhesion.
For most projects, a high-quality water-based acrylic latex remains the superior all-round choice—specifically a moisture- or mildew-resistant formula engineered for high-humidity spaces. Leading brands like Sherwin-Williams, Benjamin Moore, and Behr offer specialized bathroom and kitchen lines designed to perform in humid conditions. Always pair them with a quality primer for maximum adhesion.

🎨
How to Make Paint Dry Faster in High Humidity
You cannot control the weather, but you can control your painting conditions. Here is how to dry paint faster in humidity and avoid a tacky mess.
7 Practical Steps to Speed Up Drying
1
Run a Dehumidifier: For indoor projects this is your best friend. Pulling the room down to 40 to 50% RH transforms drying time.
2
Add Airflow: Place a fan near an open window to push humid air out and pull drier air in. Moving air speeds evaporates. Good air conditioning also lowers indoor humidity nicely.
3
Apply Thin Coats: A thick layer traps moisture and takes far longer to dry. Thin, even coats dry faster and cure stronger. Quality brushes and rollers make thin, smooth coats easier.
4
Choose the Right Paint: Reach for moisture-resistant formulas in damp rooms, or oil-based where appropriate.
5
Give It Extra Time: If the can says wait 4 hours, wait 8. If it still feels tacky, wait longer. Patience beats a peeling wall.
6
Paint Clean, Dry Surfaces: Never paint over a damp or dirty wall. Trapped moisture causes adhesion failure. Pros use a moisture meter and aim for surfaces below about 12 to 15% moisture.
7
Time It Right: Aim for below 50% humidity, ideally late morning to early afternoon, and never paint right after rain.
💡 Pro Tip: Circulating air with fans creates continuous movement across the wet paint film, helping water vapor escape even when ambient relative humidity is elevated.
🛠️ Explore Helpful Painting & Climate Tools: Calculate your room's cooling requirements or find the right application tools for smooth, even coats.

What Goes Wrong When You Paint in High Humidity
Humidity does not just slow down drying times—it can completely ruin an entire paint job. Here are the most common issues to watch out for:
Common High-Humidity Paint Failures
●
Tacky, Never-Drying Paint: The classic "paint not drying in humidity" complaint, where the finish remains soft and sticky even after 24 hours.
●
Uneven Finish: Different sections of the surface dry at unequal rates, leaving behind a patchy, blotchy appearance.
●
Runs and Sags: Paint that cannot set fast enough begins to slide down the wall under its own weight.
●
Poor Adhesion: The paint film fails to bond properly with the substrate, causing it to peel or flake off later.
●
Blistering: Trapped moisture expands beneath the surface film, causing unsightly bubbles to form under the paint layer.
●
Mold and Mildew: Excess ambient moisture combined with fresh, uncured paint creates an ideal breeding ground for spores, especially in bathrooms and kitchens.
⚠️ Prevention Tip: If your room's relative humidity is consistently above 70%, pause your project or use a dehumidifier to bring moisture levels down before applying your next coat.
🏡
Room-by-Room: Bathrooms, Basements and More
Specialty Spaces & Exterior Timing
Bathroom Painting:
Bathrooms are humidity central. Run the exhaust fan during and for about 72 hours after painting, and avoid hot showers for 48 hours so steam does not settle on the fresh film. Planning a bigger refresh? Our bathroom renovation calculator helps you budget the whole project.
Basement and Garage Painting:
Basements often sit at 65 to 80% RH, so a dehumidifier is essential and drying will take longer. If damp is a recurring problem, addressing it at the source with a proper basement vapor barrier makes every future paint job easier.
Exterior and Seasonal Timing:
Outdoors, watch the dew point, not just the humidity. Keep the surface above the dew point and paint dry for at least 48 hours after. Avoid painting in direct summer sun, which dries paint too fast, and never start if rain is coming. For a full home refresh, our home renovation guide ties it all together.
🛠️ Explore Helpful Home & Climate Tools: Calculate your room's cooling needs or select the best application tools for your project.

🛡️
Paint Safety: Health, Falls and Allergies
A beautiful finish is not worth an injury. Painting looks harmless, but the numbers say otherwise, so build these simple safety habits into every project.
Essential Project Safety Guidelines
Protect Your Health from Fumes:
Paint releases VOCs (volatile organic compounds) as it dries, which can cause headaches, dizziness, and irritated eyes, nose, and throat. Oil-based paints and primers give off far more than water-based ones. Always ventilate well, take fresh-air breaks, and wear an N95 mask or respirator when sanding or spraying. Choosing low-VOC or zero-VOC paint makes a big difference indoors.
Lead Paint Caution: The EPA estimates about 38 million U.S. homes still contain lead-based paint (mostly homes built before 1978), so test before sanding old layers.
Prevent Falls and Ladder Injuries:
This is the big one.
According to the U.S. Consumer Product Safety Commission, over 164,000 Americans are treated in emergency rooms each year for ladder-related injuries, and around 300 die. In fact, the CDC reports that 43% of fatal falls involve a ladder, and adults over 65 are especially at risk.
Protect yourself by building these ladder safety habits:
- Set the ladder on firm, level ground.
- Follow the 4-to-1 rule (one foot out for every four feet up).
- Keep three points of contact at all times.
- Never lean or overreach—move the ladder instead.
For more everyday guidance, see our top safety tips.
Avoid Paint Allergies and Skin Reactions:
Some people react to paint itself. Preservatives and hardeners in certain paints can trigger allergic contact dermatitis, itchy skin, rashes, or watery eyes and a runny nose.
Wear gloves, cover exposed skin, and keep the room well ventilated. If you have sensitive skin or asthma, choose low-VOC, low-biocide formulas and test a small amount first. Stop and get fresh air if you feel wheezy or lightheaded.
💡 Pro Tip: Prioritizing cross-ventilation and proper ladder positioning significantly reduces the most common hazards associated with home painting projects.

Precautions For Home Pets
Home painting, renovations, and gardening projects introduce unique safety risks for dogs, cats, and small animals. Pets have sensitive respiratory systems, heightened curiosity, and a habit of grooming anything that gets on their fur or paws.
5 Essential Pet Precautions During Home Projects
1
Isolate Pets in a Safe Room: Keep pets strictly out of active work zones. Secure them in a quiet, well-ventilated room far from fumes, ladders, open paint cans, or power tools.
2
Protect Sensitive Lungs from Fumes: Paint VOCs, solvent vapors, and sanding dust are significantly more toxic to small animals than humans. Use low-VOC or zero-VOC products and keep exhaust fans running continuously.
3
Prevent Wet Paint Paw Grooming: If a pet steps in wet paint, do not allow them to lick or groom themselves, as ingesting paint or solvents causes severe chemical toxicity. Wash paws immediately with mild pet shampoo and warm water—never use mineral spirits or paint thinners on skin or fur.
4
Seal Cans and Store Chemicals Higher Up: Store paint trays, primers, fertilizers, and garden chemicals securely elevated or behind closed doors. Curiosity often leads to accidental spills or poisonings.
5
Secure Exterior Gates and Doors: Work often requires doors and windows to stay propped open for airflow. Ensure outdoor gates are latched so pets do not escape while contractors or DIYers move around.
💡 Proactive Pet Safety: Always allow painted surfaces to cure completely and rooms to air out thoroughly before re-introducing pets to the space.
💡 Home Renovation & Safety Guides: Plan safe, efficient DIY and home improvement projects with our step-by-step guides:

🔥
A Quick Home and Garden Safety Note
Essential Home Safety Guidelines
Ventilation and Flammability Precautions:
Fresh paint means fumes, and oil-based paints and solvents are flammable. Keep good ventilation, never smoke near an open can, and store oily rags safely, since they can self-ignite as they dry. Good airflow protects both your lungs and your drying paint.
Smoke Detector Safety Check:
A painting project is also a great moment for a quick safety check.
The National Fire Protection Association reports that working smoke alarms cut the risk of dying in a home fire by about 60%, yet many homes have too few or none that work.
Testing yours takes two minutes, and our smoke detector placement calculator shows exactly how many you need and where to put them.
💡 Pro Tip: Always soak oily paint rags in water before sealed disposal to eliminate spontaneous combustion hazards during home renovation projects.
Frequently Asked Questions
How long does latex paint take to dry in high humidity?
In normal conditions latex is touch-dry in 1 to 2 hours and ready to recoat in about 4 hours. In high humidity that stretches to 2 to 4+ hours to touch and 8 to 10+ hours to recoat. Full cure still takes 3 to 4 weeks.
What is the ideal humidity for painting indoors?
Aim for 40 to 50% relative humidity with a temperature between about 50 and 90°F. This range lets paint dry evenly and form a strong, durable film.
Can you paint when humidity is above 70 percent?
You can, but expect drying and recoat times to roughly double, plus a higher risk of sagging and poor adhesion. Above 85% humidity you should postpone the job entirely.
Why is my paint still tacky after 24 hours?
Usually high humidity, a coat applied too thick, or poor ventilation. Improve airflow, run a dehumidifier, and simply give it more time. Most tacky latex eventually hardens once the air dries out.
How do I make paint dry faster in humid weather?
Run a dehumidifier, add fans and ventilation, apply thin coats, and keep the room warm. Lowering the humidity toward 50% is the single most effective step.
Does humidity affect paint drying more than temperature?
Both matter. Raising temperature from 50 to 70°F roughly halves latex drying time, while raising humidity from 40 to 70% roughly doubles it. Control both for best results.
How long does spray paint take to dry in humidity?
Spray paint is touch-dry in minutes normally, but high humidity can extend that and cause a cloudy "blushing" finish. Spray in thin coats on a dry, mild day for the cleanest result.
How can I tell if paint is fully cured?
Press a fingernail into an inconspicuous spot. If it leaves a mark, it is dry but not cured. A fully cured wall feels hard and no longer smells of paint, usually after 3 to 4 weeks for latex.
What is the best season to paint a house?
Late spring and early fall are ideal, with mild 50 to 85°F temperatures and moderate humidity. Avoid painting exteriors in cold winter or during humid, rainy summer spells. Interiors can be painted year-round with climate control.
✨ Final Thoughts
Humidity is the hidden factor behind most "why won't my paint dry?" headaches. Remember the simple targets: aim for 40 to 50% humidity, know that 70% can double your drying time, and never paint above 85%. Control the room with a dehumidifier and fans, apply thin coats, and give every layer extra time to cure.
🎨 Smooth Finish Ahead: Do that, and you will trade tacky, streaky walls for a smooth, professional finish that lasts for years. Check the forecast, set up your space, and paint with confidence. Your walls will thank you.
💡 Planning Your Painting Project? Ensure you purchase the exact paint quantities needed and follow best safety practices before opening a can using our interactive tools: